Free Crochet Patterns for Amigurumi Crane – Easy Beginner Step-by-Step
Introduction
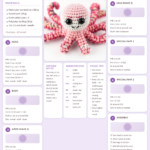
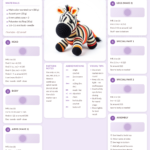
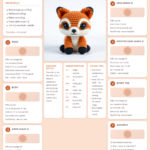
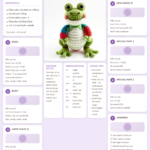
Have you ever dreamed of crafting your own elegant crochet crane but didn’t know where to start? Amigurumi, the Japanese art of crocheting stuffed creatures, has taken the crafting world by storm—and this easy amigurumi pattern makes it simple to create your own cute crochet animals at home. Whether you’re a beginner or an experienced crocheter, this crochet patterns guide will walk you through every stitch, from the crane’s graceful neck to its delicate wings. Perfect as a gift, nursery decor, or a charming addition to your collection, this crochet plushie is as rewarding to make as it is to display.
Why You Will Love This crochet patterns
- Beginner-Friendly: Designed with simple stitches and clear instructions, ideal for those learning amigurumi.
- Trending Design: Amigurumi cranes are a unique and elegant addition to any crochet collection.
- Perfect Gift Idea: Handmade with love, this handmade crane makes a thoughtful present for birthdays or baby showers.
- Nursery Decor: Soft and safe for little ones, adding a touch of whimsy to any room.
- Etsy-Worthy: Create your own crochet products to sell, just like popular Etsy amigurumi patterns.
- Adorable Display Piece: Whether perched on a shelf or tucked into a gift bag, this yarn crane is sure to delight.
Materials and Tools You Need
Before you begin, gather your supplies to ensure a smooth crocheting experience. This crochet animal pattern requires basic amigurumi essentials:
Yarn Colors and Uses
- White (Main Color): For the body, head, and wings.
- Red (Accent): For the crane’s distinctive head marking.
- Black or Gray (Optional): For subtle detailing or a more natural look.
Supplies Checklist
- Crochet hook: 2.5mm (C/2) for tight stitches and defined shape.
- Fiberfill stuffing: For a plush, huggable finish.
- Safety eyes: 6mm (pair) to bring your crane to life.
- Yarn needle: For sewing parts together and weaving in ends.
- Stitch marker: To mark the beginning of rounds.
- Scissors: For trimming yarn.
Yarn Type Comparison
| Yarn Type | Pros | Cons | Best For |
|---|---|---|---|
| Cotton Yarn | Firm stitches, durable, and breathable. | Less stretchy, can be harder on hands. | Structured amigurumi like this crane. |
| Acrylic Yarn | Soft, affordable, and widely available. | Less defined stitches; may stretch over time. | Practice pieces or gifts for sensitive skin. |
For this crochet crane pattern, cotton yarn is recommended for its crisp finish and durability. If using acrylic, consider a smaller hook size to maintain tight stitches.
Step-by-Step Crane Crochet Pattern
Step 1: Crochet the Head
Start with a magic ring and work in continuous rounds (do not join).
- Round 1: 6 sc into magic ring. (6)
- Round 2: Inc in each st. (12)
- Round 3: [Sc in next st, inc in next st] x6. (18)
- Round 4: [Sc in next 2 st, inc in next st] x6. (24)
- Rounds 5–7: Sc in each st. (24)
- Round 8: [Sc in next 2 st, dec over next 2 st] x6. (18)
- Round 9: Sc in each st. (18)
- Round 10: Dec over next 2 st, sc in next 14 st. (17)
- Fasten off, leaving a long tail for sewing.
Step 2: Face Patch / Eye Markings
For a classic crane look, embroider a small red patch on the head using a yarn needle and red yarn. Attach safety eyes above the patch, spacing them evenly.
Step 3: Crochet the Body
- Round 1: 6 sc into magic ring. (6)
- Round 2: Inc in each st. (12)
- Round 3: [Sc in next st, inc in next st] x6. (18)
- Round 4: [Sc in next 2 st, inc in next st] x6. (24)
- Rounds 5–10: Sc in each st. (24)
- Round 11: [Sc in next 2 st, dec over next 2 st] x6. (18)
- Rounds 12–13: Sc in each st. (18)
- Stuff firmly with fiberfill.
- Round 14: Dec over next 2 st, sc in next 14 st. (17)
- Fasten off, leaving a tail for sewing.
Step 4: Crochet the Arms
Make 2 identical arms.
- Chain 6.
- Starting in the 2nd chain from hook: sc, hdc, dc, hdc, sc. (5)
- Fasten off, leaving a tail for sewing. Flatten slightly and sew to the sides of the body.
Step 5: Crochet the Legs
Make 2 identical legs.
- Chain 4.
- Starting in the 2nd chain from hook: sc, hdc, sc. (3)
- Fasten off, leaving a tail. Sew to the bottom of the body, spacing them evenly.
Step 6: Special Features Unique to the Crane
- Wings: Chain 10, then work back in sc. Sew to the sides of the body for a elegant touch.
- Neck: Chain 12, then work back in sc. Attach to the head and body, curving slightly for a natural pose.
Step 7: Assembly
- Sew the head securely to the top of the body.
- Attach the neck between the head and body, adjusting for a graceful curve.
- Sew the wings to the sides of the body.
- Position and sew the arms to the upper sides.
- Sew the legs to the bottom, ensuring the crane can stand upright.
- Weave in all ends with a yarn needle.
Crochet Graphic (Crane Body)
O V A x x x V A x x x x x V x x x x x x x x x x x O x x x x x x x x x x x x V A x x A V x x x x x V A V O
Legend:
| Symbol | Stitch |
|---|---|
| x | Single Crochet (sc) |
| V | Increase (inc) |
| A | Decrease (dec) |
| O | Chain (ch) |
| ● | Slip Stitch (sl st) |
Finished Measurements
| Measurement | Size |
|---|---|
| Height | Approx. 8 inches (20 cm) from head to toe |
| Width | Approx. 3 inches (7.5 cm) at the widest point |
| Skill Level | Beginner |
Creative Uses for Your Crochet Crane
- Gift for bird lovers or new parents.
- Nursery decoration to inspire a love of nature.
- Etsy product for your crochet shop.
- Holiday ornament for a festive touch.
- Photo prop for baby showers or weddings.
Common Mistakes to Avoid
- Overstuffing: Leads to distorted shapes. Stuff firmly but not excessively.
- Inconsistent tension: Keep stitches tight for a polished look. tips for even crochet tension
- Skipping stitch markers: Use a stitch marker to track rounds and avoid miscounting.
- Ignoring assembly order: Sew parts in the order listed to ensure stability.
- Using the wrong hook size: A 2.5mm hook is ideal for tight stitches. yarn weight guide
Tips for Maximizing Results
- Use a stitch marker to mark the first stitch of each round, ensuring accuracy.
- For a more defined shape, consider blocking your crane after assembly. how to block amigurumi
- Experiment with color variations—try a pink or blue crane for a playful twist!
- Add a hanging loop to the top of the head for a decorative ornament.
- Practice invisible decreases for a seamless finish. invisible decrease tutorial
Conclusion
Crocheting your own amigurumi crane is a rewarding project that combines creativity with simplicity. With this easy crochet patterns guide, you’ll have a charming stuffed crane toy ready in no time. Whether you’re gifting it to a loved one or adding it to your collection, this crochet plushie is sure to impress. So grab your yarn and hook, and let’s get started!
Download the free pattern and start crocheting your Crane today!
Frequently Asked Questions
- Can I use a different yarn weight? Yes! For a bulkier crane, use a 3.5mm hook and worsted weight yarn. Adjust stitch counts accordingly.
- How do I make the crane stand upright? Ensure the legs are sewn evenly and stuffed firmly. You can add a small felt pad to the base for stability.
- Is this pattern suitable for children? Yes, but adult supervision is recommended for young children due to small parts like safety eyes.
- Can I wash the finished crane? Hand wash in cold water and lay flat to dry. Avoid machine washing to preserve the shape.
- Where can I sell my crochet crane? Platforms like Etsy, craft fairs, or local markets are great places to showcase your handmade items.
- How long does it take to complete? Approximately 4–6 hours, depending on your crochet speed and experience level.
- What if I make a mistake? No worries! Most mistakes can be fixed by carefully undoing stitches or using the yarn to cover gaps.