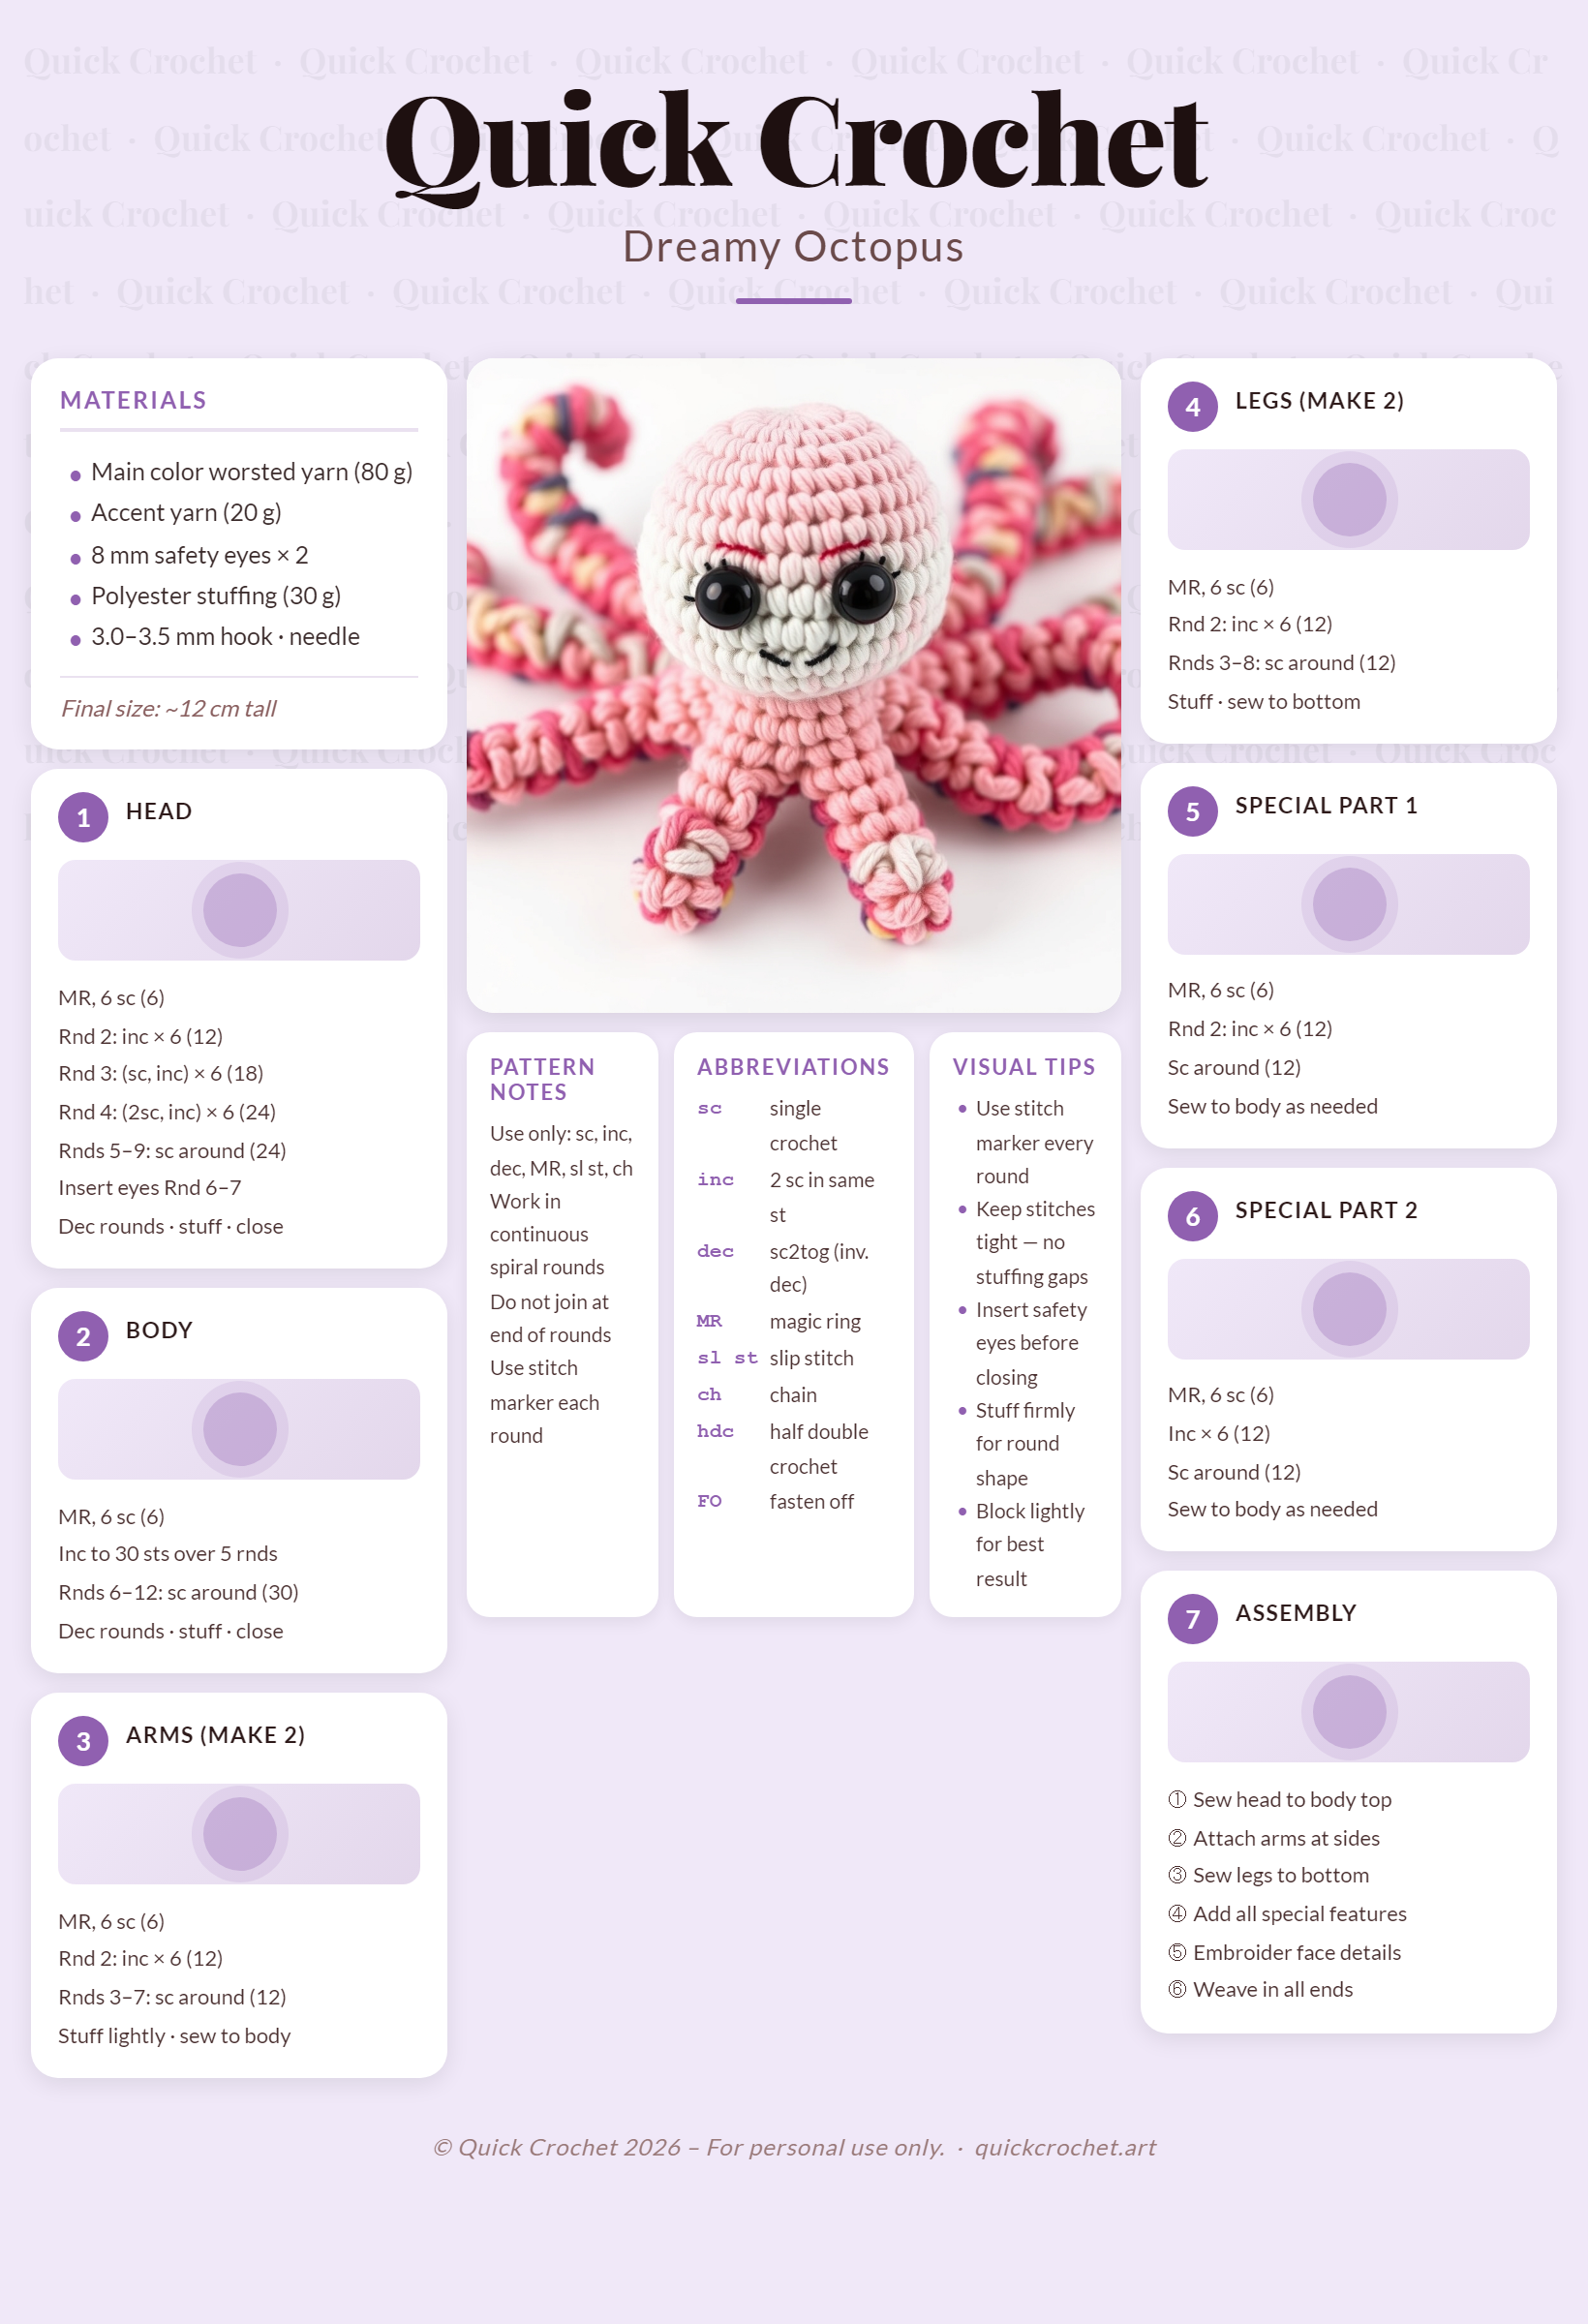
Crochet Free Octopus Pattern – Easy Amigurumi Octopus
Create a charming, squishy friend with this beginner-friendly crochet octopus pattern. Perfect for gifts, nursery decor, or a fun weekend project!
Introduction
Have you ever wondered how to transform a simple ball of yarn into a playful, tentacled sea creature? This crochet free octopus pattern makes it effortless for crocheters of all skill levels to create an adorable amigurumi octopus. Whether you’re looking for a heartfelt gift, a whimsical nursery addition, or just a fun craft project, this pattern delivers charm and simplicity in every stitch.
Designed with beginners in mind, the easy amigurumi octopus pattern uses basic stitches and minimal materials. You’ll end up with a huggable plushie that’s as fun to make as it is to display. Plus, customizable colors let you match any theme or room décor. Ready to dive into your first octopus project? Let’s get started!
Why You Will Love This Crochet Octopus Pattern
- Perfect for beginners: Uses simple stitches like single crochet and increases/decreases. No complex shaping required!
- Trending and adorable: Amigurumi octopuses are among the most popular crochet plushies on Etsy and Instagram.
- Great for gifts: A handmade stuffed octopus makes a unique baby shower gift, newborn present, or birthday surprise.
- Nursery and home décor: Adds a playful, ocean-themed touch to nurseries, playrooms, or shelves.
- Customizable: Change colors to match your favorite palette or theme—rainbow, pastel, or deep ocean vibes!
- Quick to make: Most crocheters can finish this in under 4 hours, making it an ideal weekend project.
Materials and Tools You Need
Yarn Colors and Uses
Choose yarn that’s smooth and easy to work with. For a classic octopus, use:
- Main body color: Approximately 100 yards of worsted weight yarn (Size 4). Cotton or acrylic works well.
- Accent color (optional): A small amount for eyes, suckers, or decorative stripes (e.g., pink or white).
Supplies Checklist
- Crochet hook: 3.5mm (E/4) or size recommended for your yarn.
- Safety eyes: 12mm (2) or embroider eyes with yarn.
- Polyester fiberfill stuffing: About 1 cup for a medium-sized octopus.
- Stitch marker: To mark the start of rounds.
- Yarn needle: For weaving in ends and sewing parts together.
- Scissors
- Fabric glue (optional): To secure suckers or facial details.
Cotton vs. Acrylic Yarn for Amigurumi
| Feature | Cotton Yarn | Acrylic Yarn |
|---|---|---|
| Stitch Definition | Excellent; holds shape well | Good; slightly stretchy |
| Durability | Strong and long-lasting | Can pill with wear |
| Ease of Use | Slightly stiffer; good for beginners | Soft and forgiving |
| Color Options | Limited, often matte finishes | Wide variety, vibrant colors |
| Best For | Structured toys, washable items | Soft plushies, gifts, frequent play |
Tip: For this pattern, cotton yarn is recommended for crisp stitches and a polished look, but acrylic works fine for a cuddly, kid-friendly toy.
Step-by-Step Octopus Crochet Pattern
Follow these instructions using US crochet terms. Use a stitch marker to mark the first stitch of each round.
Step 1: Crochet the Head
The head forms the top of the octopus and houses the eyes.
- Start with a magic ring.
- Round 1: 6 sc in ring. Pull tight to close. (6)
- Round 2: 2 sc in each st around. (12)
- Round 3: *Sc in next st, 2 sc in next st*; repeat * to * around. (18)
- Round 4: Sc in next 2 sts, 2 sc in next st; repeat around. (24)
- Round 5–8: Sc in each st around. (24)
- Round 9: Sc in next 2 sts, sc2tog; repeat around. (18)
- Round 10: Sc2tog around. (9)
- Stuff firmly.
- Round 11: Sc2tog around. (4)
- Fasten off, leaving a long tail for sewing.
Step 2: Face Patch / Eye Markings (Optional)
If adding eyes or facial features, embroider or glue them onto Round 5–6. Alternatively, use safety eyes before closing the head.
Step 3: Crochet the Body
The body tapers from the head to a rounded bottom.
- Join yarn at the base of the head (where it meets the neck).
- Round 1: Sc in each of the 24 stitches from the neck. (24)
- Round 2: Sc in next 3 sts, 2 sc in next st; repeat around. (30)
- Round 3: Sc in next 4 sts, 2 sc in next st; repeat around. (36)
- Round 4–7: Sc in each st around. (36)
- Round 8: Sc in next 4 sts, sc2tog; repeat around. (30)
- Round 9: Sc in next 3 sts, sc2tog; repeat around. (24)
- Round 10–12: Sc in each st around. (24)
- Round 13: Sc in next 2 sts, sc2tog; repeat around. (18)
- Stuff firmly.
- Round 14: Sc2tog around. (9)
- Fasten off, leaving a tail for closing.
Step 4: Crochet the Arms (8 Arms)
Each arm is worked in rows and attached to the body.
- Make 8 identical arms.
- Chain 15.
- Row 1: Starting in 2nd ch from hook, sc in each ch across. (14)
- Row 2–12: Ch 1, turn, sc in each st across. (14)
- Row 13: Sc in next 6 sts, sc2tog. (13)
- Row 14: Sc in next 5 sts, sc2tog. (12)
- Row 15: Sc in next 4 sts, sc2tog. (11)
- Row 16: Sc in next 3 sts, sc2tog. (10)
- Row 17: Sc in next 2 sts, sc2tog. (9)
- Row 18: Sc in next st, sc2tog. (8)
- Fasten off, leaving a long tail for sewing.
Step 5: Crochet the Legs (Optional)
For a more realistic octopus, add 2 small legs at the base of the body.
- Chain 8.
- Row 1: Starting in 2nd ch from hook, sc in each ch across. (7)
- Row 2–6: Ch 1, turn, sc in each st across. (7)
- Fasten off, leaving a tail.
Make 2 legs.
Step 6: Special Features Unique to the Octopus
The octopus’s personality comes from its suckers and expression!
- Suckers: Use pink yarn to embroider small circles along the inner sides of each arm (optional).
- Eyes: Attach safety eyes between Round 5–6 of the head, or embroider them with black yarn.
- Mouth: Use a contrasting color to embroider a small smile under the eyes.
Step 7: Assembly
Time to bring your octopus to life!
- Attach safety eyes or embroider facial features.
- Sew the arms symmetrically around the body: 4 on the top half, 4 on the bottom, spaced evenly.
- Weave in all ends with a yarn needle.
- For legs, attach them to the base of the body with a whipstitch.
- Give your octopus a final stuffing adjustment and shape.
Crochet Graphic (Octopus Body)
Use this ASCII chart as a visual guide for the body shape. Note: This is a simplified representation of stitch placement.
Legend: x = Single Crochet V = Increase (2 sc in one st) A = Decrease (sc2tog) O = Chain ● = Slip Stitch x x x x x x x x x x x x x x x x x x x x x x O O O O O O O O
| Symbol | Meaning |
|---|---|
| x | Single Crochet |
| V | Increase (2 sc in one stitch) |
| A | Decrease (sc2tog) |
| O | Chain |
| ● | Slip Stitch |
Tip: The chart shows a top-down view of the head and a cross-section of the body. The chains at the bottom represent the start of the body.
Finished Measurements
| Measurement | Size |
|---|---|
| Height (from top of head to bottom of body) | 12 inches (30 cm) |
| Width (across the widest part of the body) | 8 inches (20 cm) |
| Arm Length (from base to tip) | 6 inches (15 cm) |
| Skill Level | Beginner |
Creative Uses for Your Crochet Octopus
- Baby shower gift: Pair with a handmade blanket or bib in a nautical theme.
- Nursery decoration: Hang from a mobile or place on a shelf with other ocean-themed plushies.
- Etsy product: Sell as a customizable plushie with a personalized color and name tag.
- Birthday present: Great for kids who love sea animals.
- Holiday ornament: Add a loop and hang on a Christmas tree or nursery mobile.
- Wedding favor: Create mini octopuses as cute table centerpieces.
Common Mistakes to Avoid
- Overstuffing: Can distort stitches and make assembly difficult. Stuff firmly but not too tightly.
- Inconsistent tension: Keep your stitches even to avoid lumpy sections.
- Skipping the stitch marker: Always mark the first stitch to avoid losing your place.
- Ignoring color changes: If using multiple colors for suckers or eyes, weave in ends neatly.
- Attaching arms unevenly