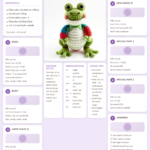
Introduction
Ever wondered how to crochet a frog that’s as charming as it is easy to make? The crochet world is brimming with delightful amigurumi patterns, but few are as universally loved as the humble frog. Whether you’re a seasoned crocheter or just starting out, this easy amigurumi frog pattern is designed to bring a smile to your face—and to anyone who sees it. Perfect for gifting, nursery decor, or adding a touch of whimsy to your home, this frog is more than just a stuffed toy; it’s a handmade treasure that captures the joy of crochet.
In this guide, you’ll find everything you need to create a crochet frog that’s both cute and durable. From selecting the right yarn to assembling your frog with precision, we’ve got you covered. So grab your hook and let’s dive into this fun and rewarding project!
Why You Will Love This crochet
- Beginner-Friendly: This pattern uses basic stitches and simple techniques, making it ideal for those new to amigurumi.
- Quick to Complete: With minimal seaming and straightforward rounds, you’ll have a finished frog in just a few evenings.
- Perfect Gift Idea: Handmade crochet frogs make heartfelt presents for birthdays, baby showers, or holiday surprises.
- Trendy and Adorable: Amigurumi frogs are popular in home decor, Etsy shops, and social media feeds for their cute, cartoon-like appeal.
- Customizable: Use different yarn colors to create frogs in various shades—lime green, teal, or even pastel pink!
- Great for Stash-Busting: Use leftover yarn from other projects to make this frog, reducing waste and maximizing your supplies.
Materials and Tools You Need
To bring your crochet frog to life, gather these essential materials and tools:
Yarn Colors for Your Frog
- Main Color (Body): Green worsted weight yarn (#4) – approximately 50 yards
- Belly and Face Patch: White or light cream yarn – approximately 10 yards
- Eyes: Black yarn for detailing (or safety eyes for a polished look)
- Optional Accents: Light blue or yellow yarn for a cheerful expression
Essential Supplies
- Crochet Hook: 3.5mm (E/4) – perfect for tightly woven stitches in amigurumi
- Fiberfill Stuffing: Polyester fiberfill for a soft, plush finish
- Safety Eyes: 6mm black safety eyes (optional, but recommended for durability)
- Stitch Marker: To mark the beginning of rounds
- Yarn Needle: For weaving in ends and sewing parts together
- Scissors: Sharp fabric scissors for clean cuts
- Fabric Glue (Optional): To secure loose ends or reinforce joints
Yarn Type Comparison Table
| Yarn Type | Pros | Cons | Best For |
|---|---|---|---|
| Cotton Yarn | Sturdy, holds shape well, eco-friendly, breathable | Less stretchy, can be stiff for tight stitches | Structured amigurumi, eco-conscious crafters |
| Acrylic Yarn | Soft, affordable, wide color variety, easy to care for | May stretch over time, less breathable | Budget-friendly projects, beginners, washable items |
For this frog, acrylic yarn is recommended for its softness and ease of use, but cotton works beautifully if you prefer a firmer finish.
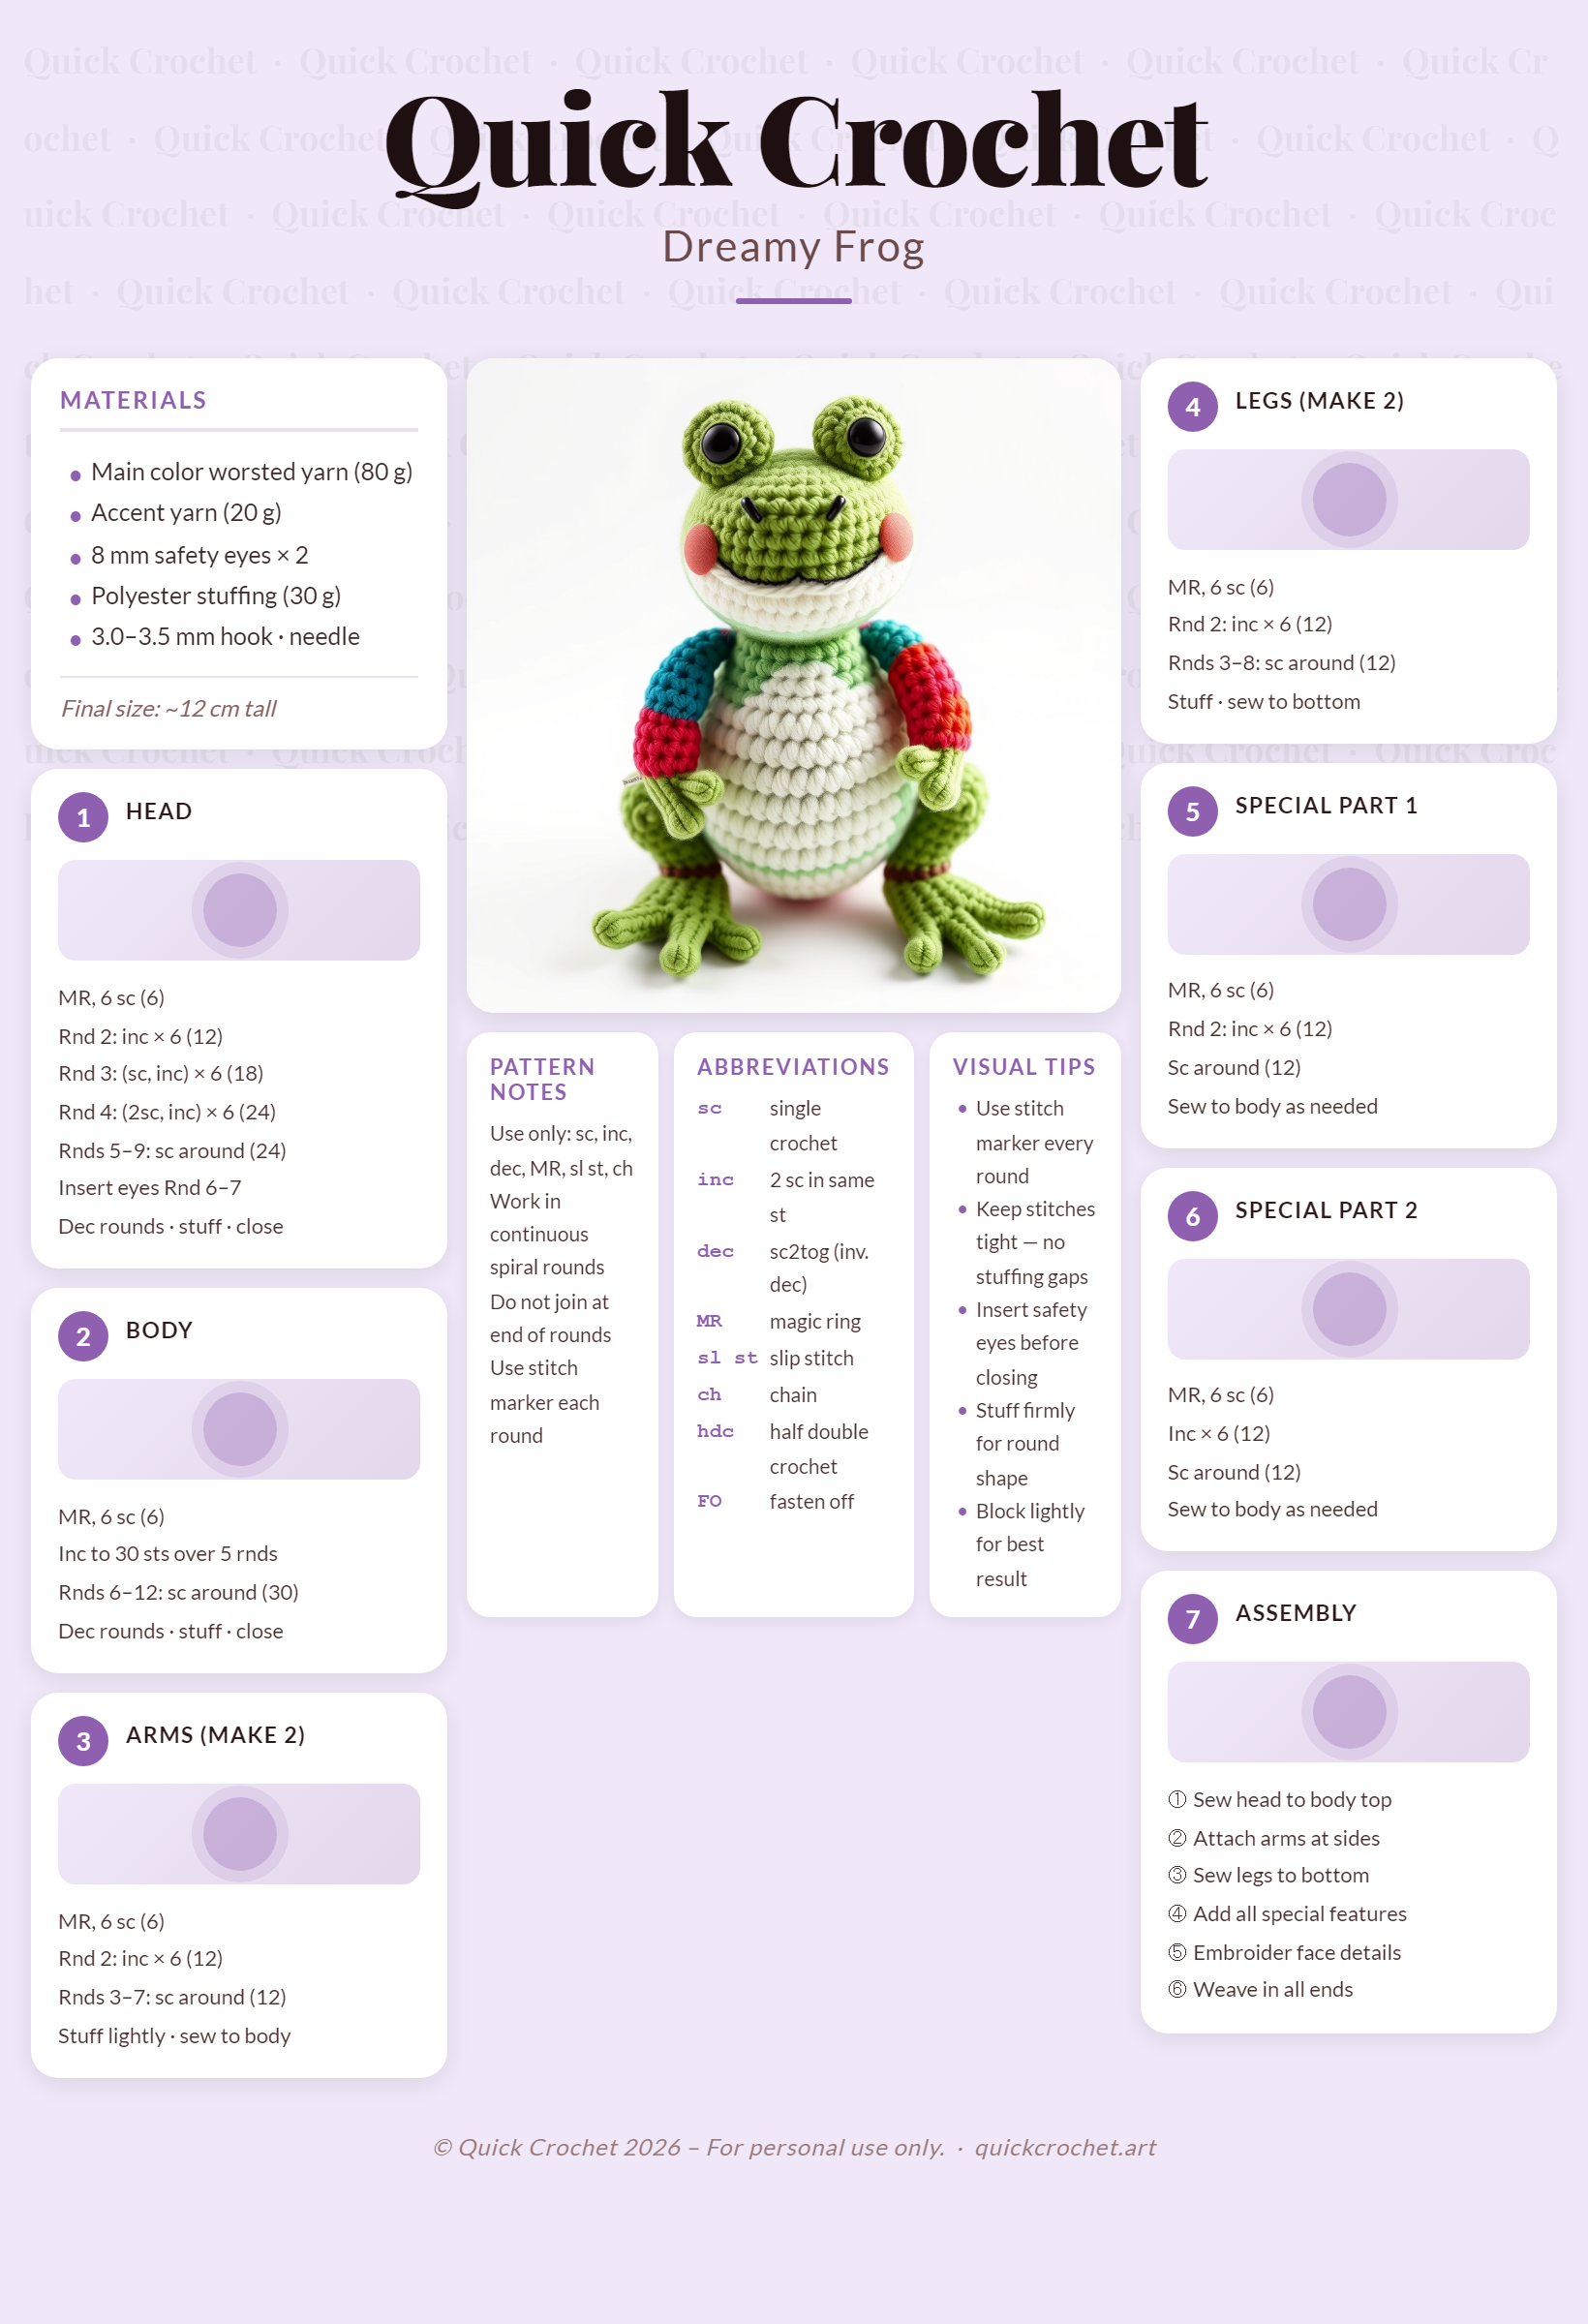
Step-by-Step Frog Crochet Pattern
Follow these detailed instructions to crochet your frog. Use a magic ring for the head and body to avoid gaps. Work in continuous rounds unless otherwise noted.
Step 1: Crochet the Head
Round 1: Magic ring, ch 1, 6 sc into ring. (6)
Round 2: 2 sc in each st around. (12)
Round 3: *Sc in next st, 2 sc in next st*; repeat from * to * around. (18)
Round 4: *Sc in next 2 sts, 2 sc in next st*; repeat from * to * around. (24)
Rounds 5–8: Sc in each st around. (24 sts each round)
Round 9: *Sc in next 2 sts, sc2tog*; repeat from * to * around. (18)
Round 10: *Sc in next st, sc2tog*; repeat from * to * around. (12)
Round 11: Sc2tog around. (6)
Fasten off and weave in end. Leave a long tail for sewing.
Step 2: Face Patch (Optional)
Using white yarn, crochet a small oval patch:
Chain 8. Starting from second ch from hook: sc in each ch. Chain 1, turn. Sc in each st across. Fasten off.
Sew the patch to the front of the head, centered above the eyes. Use black yarn to embroider a smile or add cheeks with pink yarn.
Step 3: Crochet the Body
Round 1: Magic ring, ch 1, 6 sc into ring. (6)
Round 2: 2 sc in each st around. (12)
Round 3: *Sc in next st, 2 sc in next st*; repeat from * to * around. (18)
Round 4: *Sc in next 2 sts, 2 sc in next st*; repeat from * to * around. (24)
Rounds 5–9: Sc in each st around. (24 sts each round)
Round 10: *Sc in next 2 sts, sc2tog*; repeat from * to * around. (18)
Round 11: *Sc in next st, sc2tog*; repeat from * to * around. (12)
Fasten off and weave in end. Leave a long tail for sewing.
Step 4: Crochet the Arms (Make 2)
Round 1: Magic ring, ch 1, 6 sc into ring. (6)
Rounds 2–4: Sc in each st around. (6)
Fasten off and leave a long tail. Flatten slightly and sew to the sides of the body, just below the head.
Step 5: Crochet the Legs (Make 2)
Round 1: Magic ring, ch 1, 6 sc into ring. (6)
Round 2: 2 sc in each st around. (12)
Rounds 3–5: Sc in each st around. (12)
Round 6: *Sc in next 2 sts, sc2tog*; repeat from * to * around. (9)
Round 7: Sc in each st around. (9)
Fasten off and leave a long tail. Flatten slightly and sew to the bottom of the body, angled outward for a sitting pose.
Step 6: Special Features Unique to the Frog
Add character with these details:
- Eyes: Attach safety eyes between Round 6–7 of the head, spaced 4–5 stitches apart. Or, embroider eyes with black yarn.
- Tongue: Cut a small red felt piece or crochet a tiny chain, then sew under the mouth.
- Webbed Feet: On the legs, embroider light blue lines between toes using a whipstitch.
- Spots: Add black yarn dots on the back using a duplicate stitch or French knots for a spotted frog.
Step 7: Assembly
- Stuff the head and body firmly with fiberfill. Do not overstuff—keep it soft.
- Sew the head to the top of the body using the long tail, ensuring it’s centered.
- Attach the arms symmetrically, about 2–3 rounds below the head.
- Sew the legs to the bottom of the body, spreading them slightly for a natural stance.
- Weave in all ends securely using a yarn needle.
- Optional: Use fabric glue to reinforce joints if needed.
Crochet Graphic (Frog Body)
Here’s an ASCII chart representing the body shape of your frog. This is a simplified top-down view of the body rounds:
● / \ x x / \ x x / \ x x x x x \ / x x \ / x x \ / ●
Legend:
| Symbol | Meaning |
|---|---|
| x | Single Crochet (sc) |
| V | Increase (2 sc in one st) |
| A | Decrease (sc2tog) |
| O | Chain (ch) |
| ● | Slip Stitch (sl st) |
This visual helps you visualize how the stitches grow and taper to form the frog’s rounded body.
Finished Measurements
| Measurement | Size |
|---|---|
| Height | Approximately 12 inches (30 cm) from head to toe |
| Width | About 6 inches (15 cm) at the widest part (body) |
| Skill Level | Beginner (Basic amigurumi skills required) |
These measurements are approximate and can vary slightly based on yarn thickness and stuffing.
Creative Uses for Your Crochet Frog
Your finished frog isn’t just a toy—it’s a versatile handmade item!
- Baby Shower Gift: A stuffed frog makes a sweet keepsake for a new baby’s room.
- Nursery Decoration: Hang your frog from a mobile or place it on a shelf as part of a themed collection.
- Etsy Product: Sell your frogs on handmade marketplace platforms as part of a crochet animal collection.
- Birthday Present: Gift a personalized frog with a name tag or small charm.
- Holiday Ornament: Use cotton yarn and stuff lightly to create a festive frog for your tree.
Want more inspiration? Check out crochet animal patterns for other adorable creatures to add to your collection.
Common Mistakes to Avoid
- Overstuffing: Too much fiberfill can distort the frog’s shape and make stitches pop.
- Inconsistent Tension: Keep your stitches tight and even to maintain a smooth, professional look.
- Skipping Stitch Markers: Use a stitch marker to track rounds—it’s a lifesaver in amigurumi!
- Ignoring Safety Eyes: If using safety eyes, insert them before stuffing the head to ensure proper placement.
- Rushing Assembly: Take your time sewing parts together—symmetry matters for a polished finish.
Tips for Maximizing Results
- Use a Hook One Size Smaller: For tighter stitches, switch to a 3.25mm hook if your stitches are too loose.
- Block Your Pieces: Gently steam or wet-block your frog parts before assembly to shape them accurately.
- Add Weighted Stuffing: For a firmer frog, insert poly pellets in the body before stuffing with fiberfill.
- Keep Yarn Tails Long: Leave at least 6 inches for sewing—it makes assembly much easier.
- Practice the Magic Ring: Master this technique to avoid starting holes in your amigurumi.
For more advanced tips, visit Yarnspirations Tips & Techniques.
Conclusion
Congratulations! You’ve just created a charming, handmade crochet frog that’s as fun to make as it is to display. Whether you’re adding it to your crochet animal family or gifting it to a loved one, this easy amigurumi frog pattern proves that great things come in small (and green!) packages. With its beginner-friendly design and endless customization options, you’ll want to make a whole pond full of these cute crochet animals.
Ready to get started? Download the free pattern and pick up your yarn today—your next crochet masterpiece is waiting!
Frequently Asked Questions
- Can I use this pattern to make a larger or smaller frog?
Yes! Adjust your hook size and yarn weight proportionally. For a bigger frog, use a bulkier yarn and larger hook (e.g., 4.5mm for worsted weight).
- What’s the best yarn for a durable frog?
For durability, cotton yarn is ideal as it holds its shape and is