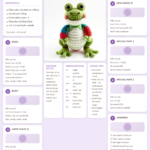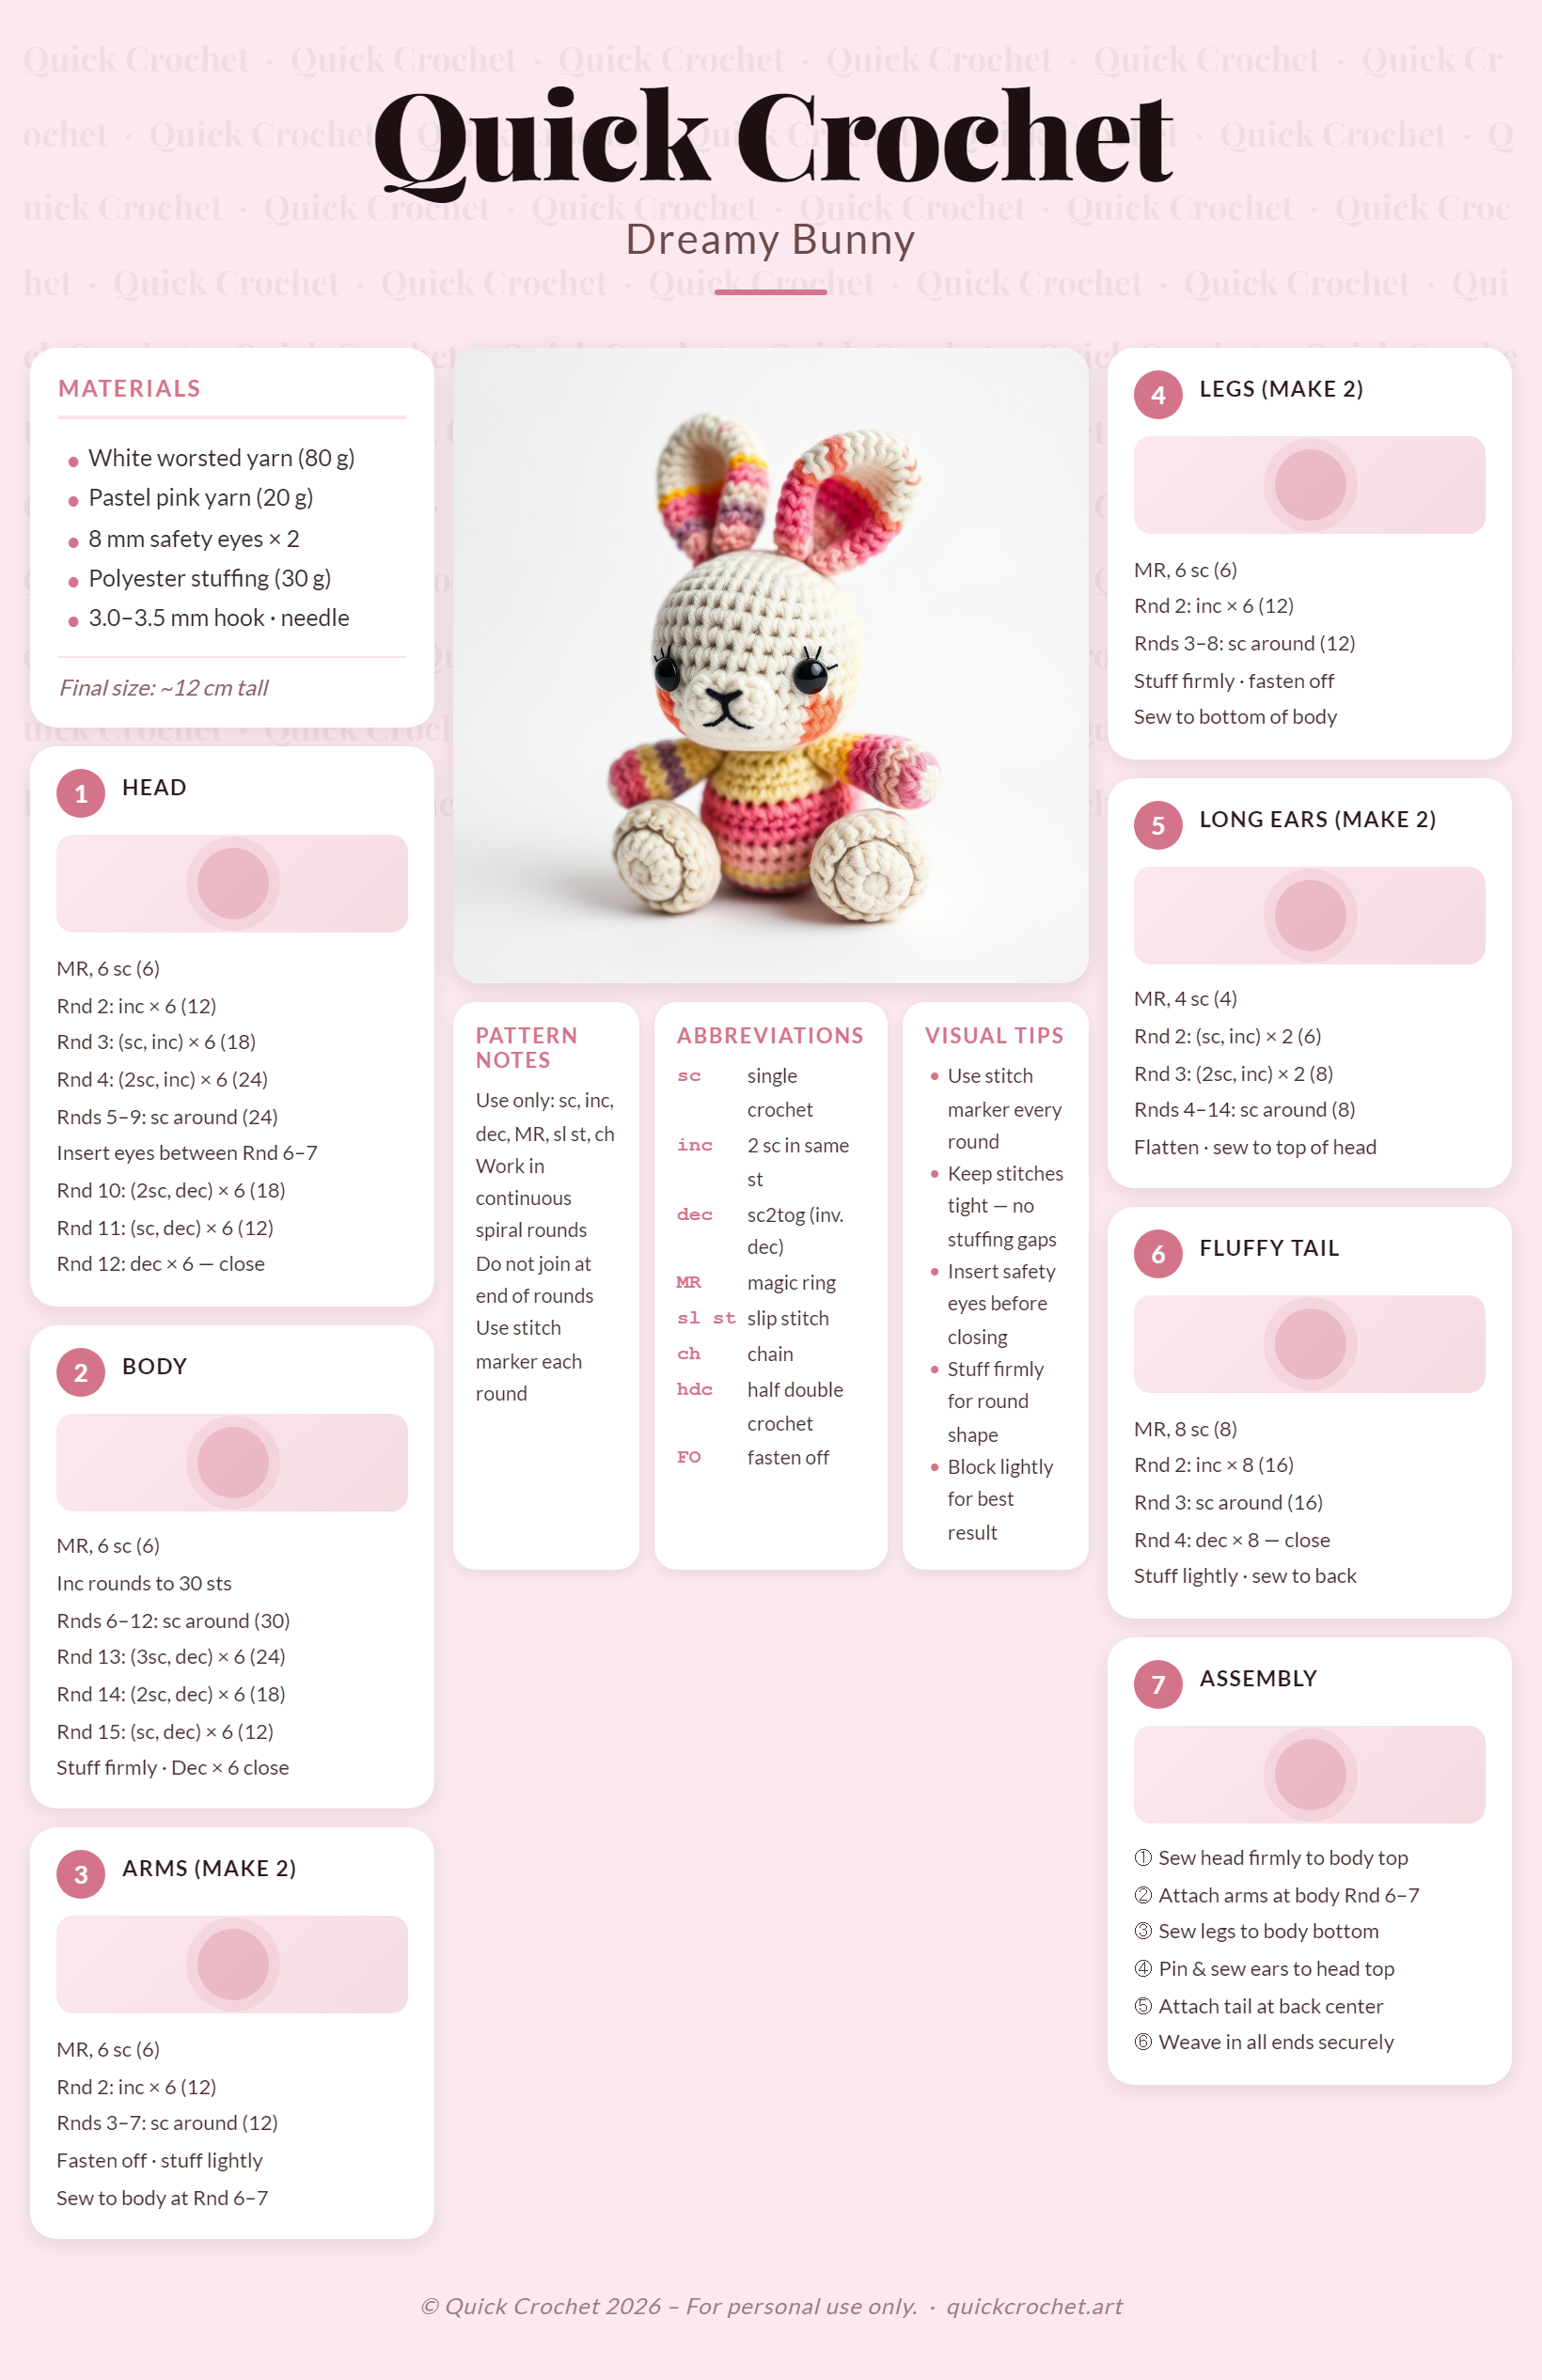
Introduction: Why This Crochet Crocodile Will Steal Your Heart
Have you ever wanted to crochet your own amigurumi crocodile but felt overwhelmed by complex patterns? This easy crochet crocodile pattern is designed with beginners in mind, making it the perfect project whether you’re new to amigurumi or looking for a quick, joyful make. Whether you’re crafting a playful plushie for a child, a unique nursery decoration, or a heartfelt gift, this crochet animal pattern delivers charm and simplicity in every stitch.
Crochet crocodiles are rising in popularity on platforms like Etsy, where handmade stuffed animals fetch premium prices. This pattern combines a cute, cartoon-inspired design with straightforward techniques, making it ideal for beginners. And best of all? It’s 100% free and downloadable. Ready to bring a little reptilian joy into your home? Let’s dive in!
Why You Will Love This Crochet Crocodile Pattern
- Trending Design: Amigurumi crocodiles are a hot trend in 2024, especially among eco-conscious crafters and parents. They’re quirky, adorable, and perfect for eco-friendly nursery decor.
- Beginner-Friendly: With clear round-by-round instructions and minimal shaping, this pattern is perfect for your first amigurumi animal.
- Great Gift Idea: A handmade crochet crocodile makes a unique baby shower gift, birthday present, or holiday ornament — especially for reptile-loving kids.
- Versatile Decor: Place it on a shelf, use it as a mobile in a nursery, or add it to your collection of cute crochet animals.
- Popular on Etsy: The demand for small crochet plushies is high. This pattern is inspired by best-selling listings, ensuring your finished piece is both cute and marketable.
- Quick Make: With simple body parts and minimal sewing, you can complete this crochet crocodile in just a few hours.
Whether you’re gifting it, selling it, or keeping it as a keepsake, you’ll love the result — and so will everyone who sees it!
Materials and Tools You Need
Before you start, gather your supplies. Here’s everything you’ll need to bring your crochet crocodile to life:
Yarn Colors & Uses
- Green (Main Color): For the body, head, tail, arms, and legs.
- White (Optional): For teeth or belly markings.
- Black (Optional): For eyes, nostrils, or decorative stripes.
- Pink or Red (Optional): For inner mouth or tongue detail.
For best results, use worsted weight yarn (Category 4). This weight is sturdy enough for amigurumi and gives your crocodile a nice, plump shape.
Essential Supplies
| Item | Recommended | Notes |
|---|---|---|
| Crochet Hook | 3.5mm (E/4) | Standard for worsted-weight amigurumi. |
| Safety Eyes | 6mm (set of 2) | For a playful, toy-safe look. |
| Fiberfill Stuffing | 100% polyester | Medium density for structure. |
| Stitch Marker | Locking or split ring | Helps track rounds in continuous crochet. |
| Yarn Needle | Blunt-tip, large eye | For sewing parts together and weaving in ends. |
| Scissors | Sharp embroidery scissors | For clean cuts. |
Cotton vs. Acrylic Yarn for Amigurumi
Both fibers work well, but they offer different benefits:
| Fiber Type | Pros | Cons |
|---|---|---|
| Cotton Yarn (e.g., Sugar ‘n Cream) | Sturdy, holds shape, eco-friendly, great stitch definition. | Can be stiff, less soft for babies; may split. |
| Acrylic Yarn (e.g., Red Heart Super Saver) | Soft, affordable, wide color range, gentle for baby toys. | Less breathable, may pill over time. |
Recommendation: Use cotton for durability and stitch clarity, especially if you plan to sell or gift the crocodile. Use acrylic for a softer, cuddly finish.
Step-by-Step Crochet Crocodile Pattern
Follow these instructions carefully. We’ll work in continuous rounds using joined spiral technique (no slip stitch joins unless noted). Use a stitch marker to mark the first stitch of each round.
Step 1: Crochet the Head
Round 1: Start with a magic ring. Work 6 sc into ring. (6)
Round 2: 2 sc in each stitch around. (12)
Round 3: *Sc in next stitch, 2 sc in next stitch*; repeat from * to * around. (18)
Round 4: Sc in each stitch around. (18)
Round 5: *Sc in next 2 stitches, 2 sc in next stitch*; repeat from * to * around. (24)
Round 6–8: Sc in each stitch around. (24)
Round 9: *Sc in next 3 stitches, 2 sc in next stitch*; repeat from * to * around. (30)
Round 10–12: Sc in each stitch around. (30)
Round 13: *Sc in next 4 stitches, 2 sc in next stitch*; repeat from * to * around. (36)
Round 14–16: Sc in each stitch around. (36)
Round 17: Start decreasing for top shaping.
*Sc in next 8 stitches, sc2tog*; repeat from * to * around. (32)
Tip: Place safety eyes between Round 11 and 12, about 6–7 stitches apart.
Step 2: Face Patch / Eye Markings
Optional: Use black yarn and a yarn needle to embroider small nostrils above the mouth line and subtle wrinkles near the eyes for character. For a friendly look, add a small white circle inside each safety eye using yarn or embroidery thread.
Step 3: Crochet the Body
Round 1: Magic ring, 6 sc. (6)
Round 2: 2 sc in each stitch. (12)
Round 3: *Sc in next stitch, 2 sc in next stitch*; repeat around. (18)
Round 4: Sc in each stitch. (18)
Round 5: *Sc in next 2 stitches, 2 sc in next stitch*; repeat around. (24)
Round 6–10: Sc in each stitch. (24)
Round 11: *Sc in next 6 stitches, sc2tog*; repeat around. (21)
Round 12: *Sc in next 5 stitches, sc2tog*; repeat around. (18)
Round 13–15: Sc in each stitch. (18)
Start stuffing firmly as you go.
Step 4: Crochet the Arms (Make 2)
Round 1: Magic ring, 6 sc. (6)
Round 2: 2 sc in each stitch. (12)
Round 3: Sc in each stitch. (12)
Flatten slightly and fasten off, leaving a long tail for sewing.
Positioning: Sew arms to sides of the body, just below the head attachment line. Angle slightly forward.
Step 5: Crochet the Legs (Make 2)
Round 1: Magic ring, 6 sc. (6)
Round 2: 2 sc in each stitch. (12)
Round 3: Sc in each stitch. (12)
Flatten and fasten off.
Positioning: Sew legs to the bottom of the body, spaced evenly for stability.
Step 6: Special Features Unique to the Crocodile
- Tail:
Chain 12, sc in second chain from hook and across. Fasten off. Sew into a slight curve at the back of the body. - Snout:
Chain 8, sc in second chain, hdc in next, dc in next, hdc in next, sc in last. Fold flat and sew under the head tip for a snout effect. - Spikes:
Make 6 small spikes by chaining 4, sc in second chain from hook, fasten off. Sew along the back and tail. Use green yarn for matching, or add black for contrast.
Step 7: Assembly
- Stuff head and body firmly with fiberfill.
- Sew head to the top of the body using a whipstitch or mattress stitch.
- Attach safety eyes between Round 11 and 12 of the head.
- Sew tail to the back of the body, centered.
- Weave in all ends securely using a yarn needle.
- Add optional inner mouth lining with pink yarn for a tongue.
- Optional: Brush the crocodile lightly with a pet slicker brush to fluff the stitches.
Crochet Graphic: Crocodile Body Shape
Here’s an ASCII chart representing the body shape of your crochet crocodile. Each symbol corresponds to a stitch type:
O O ● x x ● x x x x x x x x x x x x x x x x x x x x x x x xxx •
Legend:
| Symbol | Meaning |
| x | Single Crochet (sc) |
| V | Increase (2 sc in one stitch) |
| A | Decrease (sc2tog) |
| O | Chain (ch) |
| ● | Slip Stitch (sl st) |
Note: The chart is a simplified top-down view showing the widening and tapering shape of the crocodile’s body.
Finished Measurements
Here’s what to expect once your crochet crocodile is complete:
| Measurement | Size |
|---|---|
| Height (from head to tail) | 12 inches (30.5 cm) |
| Width (at widest point) | 6 inches (15 cm) |
| Skill Level | Beginner |
These dimensions make it the perfect size for a baby toy, desk companion, or stocking stuffer!
Creative Uses for Your Crochet Crocodile
This adorable crochet crocodile isn’t just a toy — it’s a versatile craft that can be used in many ways:
- Baby Shower Gift: Include it in a themed gift basket for a new parent.
- Nursery Decoration: Hang it from a mobile or place it on a shelf as part of a safari-themed nursery.
- Etsy Product: Sell it as a “cute crochet plushie” on your online store with a fun backstory.
- Birthday Present: A unique alternative to traditional stuffed animals for reptile-loving kids.
- Holiday Ornament: Add a hanging loop and gift it as a whimsical home decor piece.
- Photo Prop: Use in themed photo shoots or as a playful background element.
With so many possibilities, your crocodile will be cherished for years to come!
Common Mistakes to Avoid
Even simple patterns have pitfalls. Avoid these to ensure your crocodile turns out perfect:
- Over-stuffing: Can distort stitches and make assembly difficult. Stuff firmly but not tightly.
- Inconsistent tension: Causes uneven shaping. Practice keeping stitches tight and consistent.
- Skipping the stitch marker: Without it, you may lose track of rounds and increase/decrease points.
- Sewing parts upside down: Double-check alignment before stitching. Arms and legs should point naturally.
- Ignoring safety eyes: Always use safety eyes for toys meant for children under 3.
Tips for Maximizing Results
- Use a stitch counter app: Helps prevent missed increases or decreases.
- Block your pieces: Lightly steam or wet-block the head and body to shape them before assembly.
- Change colors neatly: Carry the yarn up the inside of your work when changing colors to minimize ends.
- Keep a “frog” handy: If a part goes wrong, frog it (undo it) and try again — amigurumi is forgiving!
- Add personality: Use embroidery to add smiles, scars, or even a crochet bowtie for a dapper look.