Have You Ever Wanted to Crochet the Most Adorable Walrus? Meet the Ultimate panda crochet Guide!
There’s something magical about crocheting animals—each stitch brings a tiny creature to life with personality and charm. If you’re searching for a panda crochet project that’s both fun and rewarding, this easy amigurumi Walrus pattern is your perfect match. Whether you’re a beginner looking for your first stuffed Walrus toy or an experienced crafter wanting to expand your collection of crochet plushies, this pattern delivers simplicity, cuteness, and a satisfying result.
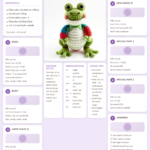
This crochet Walrus isn’t just cute—it’s a versatile piece that works beautifully as a gift, nursery decoration, or even a playful desk buddy. Best of all? You can create your very own handmade Walrus using this free pattern, complete with step-by-step instructions and a handy ASCII chart. Let’s dive in!
—
Why You Will Love This panda crochet Walrus Pattern
- Beginner-Friendly: Clear, round-by-round instructions make this the ideal beginner crochet pattern, even if you’ve never made amigurumi before.
- Trending Design: Amigurumi animals are more popular than ever, and this Walrus fits right in with the cute crochet animals trend sweeping social media.
- Perfect Gift Idea: Handmade gifts are cherished, and a yarn Walrus makes a heartfelt present for birthdays, baby showers, or holidays.
- Nursery Decor: Soft, huggable, and adorable—this crochet plushie is perfect for adding a cozy touch to any child’s room.
- Etsy Seller Favorite: If you’re considering selling your crafts, this simple pattern is a hit on platforms like Etsy for handmade stuffed animals.
- Customizable: Change the yarn colors or add embroidered details to make your Walrus unique—ideal for personalization.
Imagine the joy of gifting a DIY amigurumi Walrus that you made with your own hands. It’s not just a toy—it’s a piece of love stitched together with care.
—
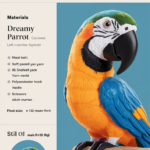
Materials and Tools You Need for Your Crochet Walrus
Before you start, gather these essentials to bring your amigurumi Walrus to life.
Yarn Colors
For an authentic look, use these yarn colors:
- Gray (main body color)
- White (belly and snout)
- Black (eye markings and tusk accents, if desired)
- Pink (optional inner ears or blush spots)
Supplies Checklist
- Crochet Hook: 3.5mm (E/4) – ideal for tight stitches that prevent stuffing from showing.
- Fiberfill Stuffing: High-quality polyester fiberfill for a soft, cuddly finish.
- Safety Eyes: 10mm black safety eyes (or embroider with black yarn for a stitched look).
- Yarn Needle: For weaving in ends and sewing parts together.
- Scissors: Sharp embroidery scissors for clean cuts.
- Stitch Marker: To mark your starting round and keep track of progress.
Yarn Type Comparison Table
| Yarn Type | Pros | Cons | Best For |
|---|---|---|---|
| Cotton Yarn | Firm stitches, holds shape well, durable | Can be stiff, less stretchy | Structured amigurumi like this Walrus |
| Acrylic Yarn | Soft, affordable, wide color range | May stretch over time, less defined stitches | Budget-friendly projects, stuffed plushies |
💡 Pro Tip: For your crochet Walrus, cotton yarn is highly recommended because it maintains the shape and stitch definition, making assembly easier and the final product more professional.
—
Step-by-Step Walrus Crochet Pattern
Follow these detailed instructions to crochet each part of your Walrus. Use a 5mm hook and worsted weight yarn unless otherwise noted.
Step 1: Crochet the Head
Start with gray yarn.
- Create a magic ring.
- Round 1: 6 sc into ring. (6)
- Round 2: Inc in each st. (12)
- Round 3: [Sc in next st, inc in next st] x6. (18)
- Round 4: [Sc in next 2 sts, inc in next st] x6. (24)
- Round 5–8: Sc in each st. (24)
- Round 9: [Sc in next 2 sts, dec] x6. (18)
- Round 10: [Sc in next st, dec] x6. (12)
- Stuff firmly.
- Round 11: Dec around. (6)
- Fasten off, leaving a tail for sewing.
Step 2: Add Eye Markings
Using black yarn, embroider two circles on the head for eyes. Add a small white dot in each for a glossy effect. Alternatively, sew on 10mm safety eyes between Rounds 6 and 7.
Step 3: Crochet the Body
Continue with gray yarn.
- Magic ring.
- Round 1: 6 sc into ring. (6)
- Round 2: Inc in each st. (12)
- Round 3: [Sc in next st, inc in next st] x6. (18)
- Round 4: [Sc in next 2 sts, inc in next st] x6. (24)
- Round 5–10: Sc in each st. (24)
- Round 11: [Sc in next 2 sts, dec] x6. (18)
- Round 12: Sc in each st. (18)
- Stuff firmly.
- Round 13: [Sc in next st, dec] x6. (12)
- Round 14: Dec around. (6)
- Fasten off.
Step 4: Crochet the Arms (Make 2)
Use gray yarn.
- Chain 6.
- Row 1: Starting in second chain from hook: sc in each st. (5)
- Rows 2–6: Ch 1, turn, sc in each st. (5)
- Fold flat and sew the long sides together. Leave the top open for stuffing.
- Stuff lightly and close.
Step 5: Crochet the Legs (Make 2)
Use gray yarn.
- Magic ring.
- Round 1: 6 sc into ring. (6)
- Round 2: Inc in each st. (12)
- Round 3–5: Sc in each st. (12)
- Fasten off, leaving a tail. Stuff lightly.
Step 6: Special Features Unique to the Walrus
- Snout: Using white yarn, create a small oval (chain 4, sc in second ch from hook, sc in next 2 chs, rotate and sc in each of the 3 loops on the starting side). Sew to center of head below eyes.
- Tusks (Optional): Cut two small white felt triangles and glue to snout, or crochet tiny tusk shapes with white yarn.
- Ears: Make two small gray ovals (chain 3, sc in second ch from hook, sc in next ch; ch 1, turn, sc in each st). Sew to top of head.
- Tail: Create a small fan shape with 3–4 rows of sc or use a tiny pom-pom.
Step 7: Assembly
- Sew the head to the top of the body.
- Attach the arms to the sides of the body, near the top.
- Sew the legs to the bottom corners of the body.
- Add the snout, tusks, and ears.
- Embroider any final details, like whiskers or a smile.
- Weave in all ends using your yarn needle.
—
Crochet Graphic: Walrus Body Shape
Use this ASCII chart to visualize the shape of your Walrus as you crochet.
● / \ / \ ● ● / \ / \ ● ● ● ● / \ | | / \ ● ● ● ● ● \ / | | \ / ● ● ● ● \ / \ / ● ● \ / ●
Legend:
| Symbol | Meaning |
| x | Single Crochet |
| V | Increase |
| A | Decrease |
| O | Chain |
| ● | Slip Stitch |
—
Finished Measurements
| Measurement | Size |
| Height | Approximately 18 inches (46 cm) from head to tail |
| Width | About 12 inches (30 cm) at the widest part |
| Skill Level | Beginner (with basic amigurumi knowledge) |
—
Creative Uses for Your Crochet Walrus
Your new handmade Walrus isn’t just a toy—it’s a versatile addition to your home or a heartfelt gift.
- Baby Shower Gift: Pair it with a soft blanket or rattle for a memorable present.
- Nursery Decoration: Place it on a shelf or crib for a whimsical touch.
- Etsy Product: Sell your finished Walrus on how to sell crochet on Etsy or at craft fairs.
- Birthday Present: Ideal for animal lovers of all ages.
- Holiday Ornament: Attach a loop and hang it on your Christmas tree.
💡 Bonus Idea: Make a mini version using a 2.5mm hook and sport weight yarn for a keychain or bag charm!
—
Common Mistakes to Avoid When Crocheting a Walrus
- Overstuffing: Can distort stitches and make assembly difficult. Stuff firmly but not too tight.
- Inconsistent Tension: Keep your stitches even to maintain a smooth finish.
- Skipping Stitch Markers: Use a stitch marker to avoid losing your place in rounds.
- Ignoring Safety Eyes: If using safety eyes, attach them before the head is fully closed to prevent gaps.
- Skipping the Snout: The white snout adds character—don’t skip this step!
—
Tips for Maximizing Results
- Use a Stitch Counter: Helps track rounds and avoid mistakes.
- Block Your Pieces: Lightly steam or wet-block parts before assembly for a polished look.
- Choose Contrasting Yarn for Sewing: Makes it easier to see stitches when attaching parts.
- Take Photos as You Go: Helps troubleshoot and share progress on social media.
- Join Amigurumi Communities: Groups on Ravelry or Facebook offer pattern support and inspiration.
—
Conclusion
You now have everything you need to crochet an adorable panda crochet Walrus! This easy amigurumi Walrus pattern is perfect for beginners, gift-givers, and anyone who loves cute crochet animals. With clear instructions, helpful graphics, and creative tips, your handmade Walrus will be ready in no time.
🎉 Ready to start? Download the free PDF pattern and begin your crochet journey today! Share your finished Walrus on social media with #MyCrochetWalrus—we’d love to see your creation!
—
Frequently Asked Questions
- Can I use different yarn weights for this crochet Walrus?
Yes! For a smaller Walrus, use a 2.5mm hook and sport weight yarn. For a larger one, try a 4mm hook and bulky yarn. Just adjust your stitch count accordingly.
- How do I prevent my amigurumi from curling?
Make sure to work in continuous rounds and maintain consistent tension. If curling occurs, try blocking or using a smaller hook.