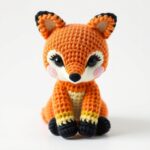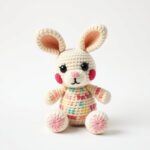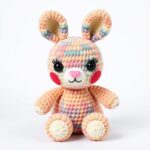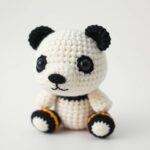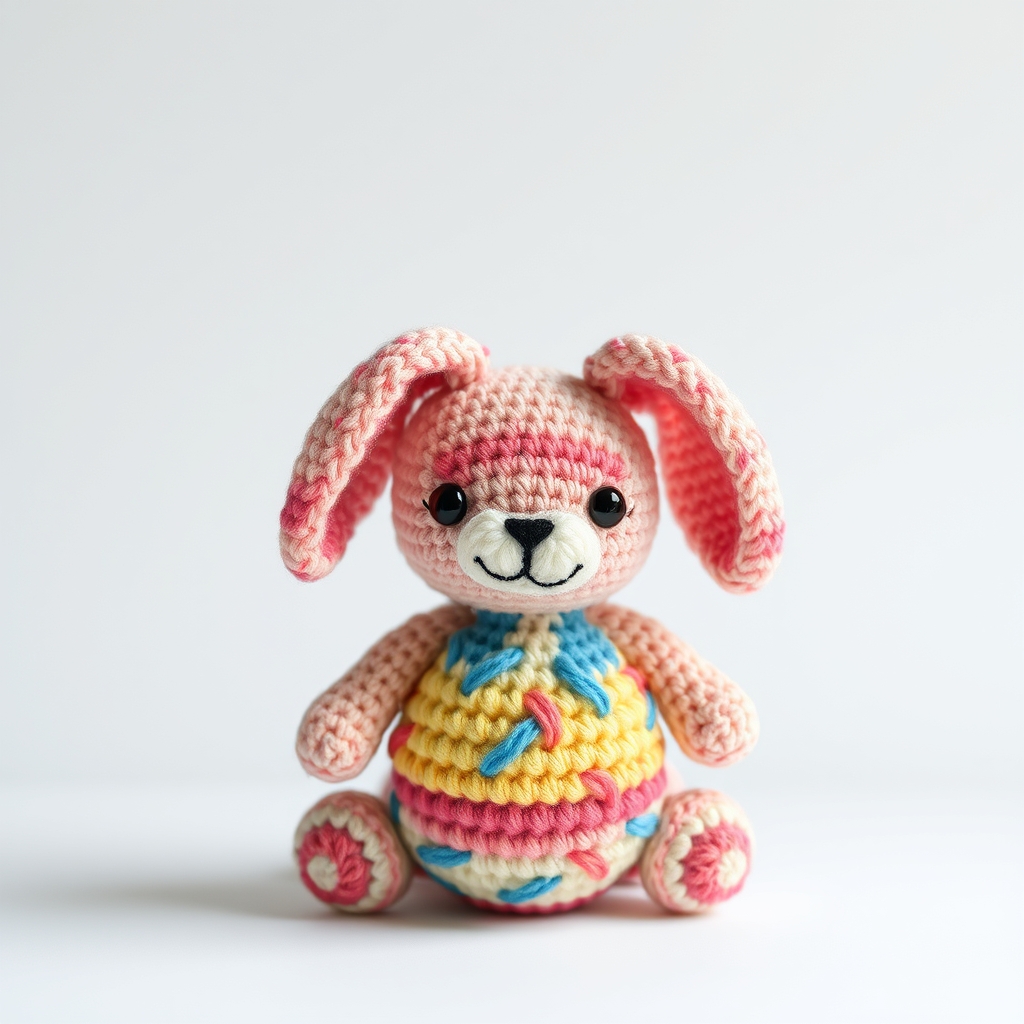
Why a Bunny Crochet Pattern Free Will Ignite Your Creativity
What if you could create a cuddly, handmade bunny that doubles as a charming decor piece or the perfect gift? The bunny crochet pattern free is your gateway to crafting adorable amigurumi bunnies with ease. Whether you’re a beginner looking to dip your toes into the world of crochet animals or an experienced crafter seeking a quick and satisfying project, this pattern delivers. Amigurumi, the Japanese art of knitting or crocheting stuffed yarn creatures, has taken the crafting world by storm—and for good reason. These tiny, huggable creations are not only fun to make but also make heartfelt gifts for birthdays, baby showers, and holidays.
This bunny crochet pattern free is designed to be beginner-friendly, ensuring that even those new to crochet can achieve stunning results. With a clear, step-by-step guide, you’ll learn to craft every part of the bunny, from the floppy ears to the tiny paws. Plus, the materials required are simple and affordable, making it an accessible project for anyone. Ready to bring your bunny to life? Let’s dive into the world of crochet animals and start creating!
Why You Will Love This Bunny Crochet Pattern Free
- Trending and Adorable: Amigurumi bunnies are currently one of the most popular crochet animals, featured in countless social media posts and craft fairs.
- Beginner-Friendly: The pattern includes easy-to-follow instructions, perfect for those just starting their crochet journey.
- Great Gift Idea: Handmade bunnies make thoughtful and unique presents for loved ones of all ages.
- Perfect for Nursery Decor: Add a touch of whimsy to any nursery or child’s room with a crocheted bunny plushie.
- Popular on Etsy: Many crafters sell similar patterns on Etsy—now you can make your own and save money!
- Cute and Customizable: Experiment with different yarn colors and accessories to create your dream bunny.
Materials and Tools You Need
Before you start crocheting your bunny, gather all the necessary materials. Here’s what you’ll need:
Yarn Colors: Choose soft, worsted-weight yarn in colors like white, pink, and gray for a classic bunny look. You can also use pastel shades for a softer, more modern vibe.
Supplies:
- A crochet hook size appropriate for your yarn (usually between 3.5mm to 4.5mm).
- Polyester fiberfill for stuffing.
- Two 8mm safety eyes (or embroider the eyes if making a bunny for a young child).
- A yarn needle for sewing parts together.
- Scissors to trim yarn.
- A stitch marker to keep track of rounds.
Yarn Comparison Table:
| Yarn Type | Pros | Cons | Best For |
|---|---|---|---|
| Cotton Yarn | Durable, sturdy, holds shape well | Less stretchy, can be rough on hands | Amigurumi that needs to hold its shape |
| Acrylic Yarn | Soft, affordable, wide color range | Less durable, may stretch over time | Beginners, plushies for kids |
| Wool Yarn | Warm, natural, biodegradable | Expensive, can felt when washed | Luxury plushies, eco-friendly projects |
For the best results, use cotton or acrylic yarn in worsted weight. These yarns provide a good balance of softness and structure, making your bunny both huggable and durable. If you’re unsure about colors, start with a soft white or cream for the body and a contrasting color for the ears and paws to create a classic bunny look.
Pro Tip: If you plan to sell your crocheted bunnies, Lion Brand Yarn offers high-quality, affordable yarn options perfect for amigurumi.
Step-by-Step Bunny Crochet Pattern
Step 1: Crochet the Head
Start with a magic ring and crochet in continuous rounds.
- Round 1: 6 sc in magic ring. (6)
- Round 2: Inc in each st around. (12)
- Round 3: (Sc in next st, inc in next st) around. (18)
- Round 4: (Sc in next 2 sts, inc in next st) around. (24)
- Rounds 5–8: Sc in each st around. (24)
- Round 9: (Sc in next 2 sts, dec) around. (18)
- Round 10: (Sc in next st, dec) around. (12)
- Round 11: Dec around. (6)
- Fasten off and weave in the end.
Step 2: Crochet the Ears
Make two identical ears for a symmetrical bunny.
- Row 1: Ch 6. Starting in 2nd ch from hook, sc in each ch across. (5)
- Row 2: Ch 1, turn. Sc in each st across. (5)
- Row 3: Ch 1, turn. Sc2tog, sc in next 3 sts. (4)
- Rows 4–6: Ch 1, turn. Sc in each st across. (4)
- Fasten off and leave a long tail for sewing.
- Sew the ears to the top of the head, positioning them symmetrically.
Step 3: Crochet the Body
Work in continuous rounds, similar to the head.
- Round 1: 6 sc in magic ring. (6)
- Round 2: Inc in each st around. (12)
- Round 3: (Sc in next st, inc in next st) around. (18)
- Round 4: (Sc in next 2 sts, inc in next st) around. (24)
- Rounds 5–10: Sc in each st around. (24)
- Round 11: (Sc in next 2 sts, dec) around. (18)
- Round 12: (Sc in next st, dec) around. (12)
- Round 13: Dec around. (6)
- Stuff the body firmly with fiberfill before closing.
- Fasten off and weave in the end.
Step 4: Crochet the Arms (Make 2)
Use the same yarn color as the body.
- Row 1: Ch 4. Starting in 2nd ch from hook, sc in each ch across. (3)
- Rows 2–5: Ch 1, turn. Sc in each st across. (3)
- Fasten off and leave a long tail for sewing.
- Sew the arms to the sides of the body, positioning them symmetrically.
Step 5: Crochet the Legs (Make 2)
Make slightly longer legs for a natural bunny stance.
- Row 1: Ch 5. Starting in 2nd ch from hook, sc in each ch across. (4)
- Rows 2–6: Ch 1, turn. Sc in each st across. (4)
- Fasten off and leave a long tail for sewing.
- Sew the legs to the bottom of the body.
Step 6: Assembly
- Attach safety eyes between Rounds 6 and 7 of the head, spacing them evenly.
- Embroider a small pink nose and a smile using pink yarn or embroidery thread.
- Sew the head to the top of the body, ensuring it’s centered.
- Weave in all ends securely.
Crochet Graphic (Bunny Body)
Here’s a simple ASCII chart to visualize the bunny’s body shape. This graphic reflects the wider middle and tapering top and bottom typical of amigurumi bunnies.
● O x x x x x x x x x x x x x x x x x x x x x x x x x x x x x x x x
Legend:
| Symbol | Meaning |
|---|---|
| x | Single Crochet (sc) |
| V | Increase (inc) |
| A | Decrease (dec) |
| O | Chain (ch) |
| ● | Slip Stitch (sl st) |
Finished Measurements
Here are the approximate dimensions of your finished bunny:
| Measurement | Size |
|---|---|
| Height | About 6 inches (15 cm) |
| Width | About 4 inches (10 cm) |
| Skill Level | Beginner |
Creative Uses for Your Crochet Bunny
Your handmade bunny isn’t just a toy—it’s a versatile decor piece and gift! Here are some creative ways to use your creation:
- Baby Shower Gift: Pair your bunny with a soft blanket for the perfect newborn present.
- Nursery Decoration: Hang your bunny from a mobile or place it on a shelf for a whimsical touch.
- Etsy Product: Sell your bunnies as handmade toys or decor on Etsy marketplace.
- Birthday Present: Gift your bunny to a child or a fellow crochet enthusiast.
- Holiday Ornament: Add a bunny-themed ornament to your Christmas tree for a festive touch.
Common Mistakes to Avoid
Even with a simple pattern, it’s easy to make small errors that can affect the final look of your bunny. Here are some pitfalls to watch out for:
- Inconsistent Tension: Keeping your stitches tight and even is crucial for a neat finish. Practice on a swatch first!
- Skipping Increases or Decreases: Missing these steps can distort the shape of your bunny’s head or body.
- Overstuffing: While stuffing is necessary, too much can make your bunny stiff and lose its shape. Stuff firmly but not excessively.
- Ignoring Safety Eyes: If your bunny is for a young child, embroider the eyes instead of using safety eyes to avoid choking hazards.
- Skipping Weaving in Ends: Loose ends can unravel over time, ruining your hard work. Always weave them in securely.
Tips for Maximizing Results
Follow these best practices to ensure your bunny turns out as adorable as possible:
- Use a Stitch Marker: Mark the beginning of each round to avoid losing your place.
- Choose the Right Yarn: Opt for a smooth, worsted-weight yarn that’s easy to work with.
- Practice on a Swatch: If you’re new to amigurumi, practice basic stitches on a small swatch before starting the bunny.
- Experiment with Colors: Try different color combinations for the ears, paws, or nose to create unique bunnies.
- Block Your Bunny: After assembly, lightly steam or wet-block your bunny to smooth out any uneven stitches.
Conclusion
The bunny crochet pattern free is your ticket to creating a charming, handmade amigurumi bunny that’s perfect for gifting or decorating. With clear instructions, beginner-friendly techniques, and endless customization options, this pattern is a must-try for any crochet enthusiast. Whether you’re making a bunny for a loved one or adding to your collection of crochet animals, the process is as rewarding as the result. So grab your yarn and hook, and let your creativity hop to life!
Ready to start crocheting? Download the free pattern and start crafting your bunny today! Share your creations with us on social media using #CrochetBunnyMagic.
Frequently Asked Questions
- Can I use a different yarn weight for this pattern? Yes, but adjust your hook size accordingly. Bulky yarn will require a larger hook, while finer yarns will need a smaller one.
- How do I make my bunny larger or smaller? Adjust the starting magic ring and increase the number of rounds proportionally. For example, start with 8 sc instead of 6 for a bigger bunny.
- What’s the best way to wash a crochet bunny? Hand wash in cold water with mild detergent and lay flat to dry to preserve the shape.
- Can I add a bow or other accessories to my bunny? Absolutely! Use yarn, felt, or embroidery thread to embellish your bunny however you like.
- Where can I find more amigurumi patterns? Check out Ravelry community or [