Introduction
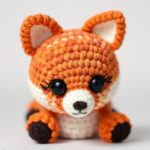
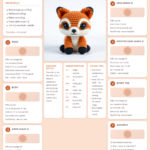
Have you ever wanted to crochet a vibrant, feathered friend that stands out in any collection? This free Peacock crochet pattern is your perfect project! Whether you’re a beginner looking to expand your skills or an experienced crocheter wanting a quick and adorable project, this pattern delivers charm and simplicity. Crochet animals like this Peacock bring personality to nurseries, living rooms, and even as thoughtful gifts. With its striking colors and elegant design, a handmade crochet Peacock is more than just a stuffed animal—it’s a statement piece that showcases your creativity and love for fiber arts.
Why You Will Love This crochet Peacock Pattern
- Beginner-friendly: Clear, step-by-step instructions make it easy to follow even for new crocheters.
- Trending design: Amigurumi Peacocks are gaining popularity on platforms like Etsy and Instagram for their vibrant colors and whimsical charm.
- Perfect gift idea: A handmade crochet plushie makes a thoughtful present for birthdays, baby showers, or holidays.
- Great for nursery decor: Adds a playful yet elegant touch to any child’s room or home office.
- Customizable: Change colors to match your decor or create a unique version with variegated yarn.
- Quick to make: With basic stitches and minimal shaping, you can complete this project in an afternoon.
If you’re new to amigurumi, consider checking out beginner’s guide to amigurumi to get started on the right foot!
Materials and Tools You Need
Yarn Colors and Uses
For this crochet Peacock, you’ll need the following yarn colors:
- Body: Light blue or turquoise (main color)
- Head and neck: Dark blue or royal blue
- Tail feathers: Iridescent peacock blue, green, and gold
- Eye markings: White and black (for contrast)
- Beak: Orange or yellow
- Feet: Red or pink
For best results, use worsted weight yarn (Category 4) for a sturdy yet soft plushie. Avoid fuzzy or textured yarns, as they can obscure stitch details.
Supplies Checklist
- Crochet hook: 3.5mm (E/4) or size needed to match gauge
- Safety eyes: 10mm (optional: embroider eyes instead)
- Fiberfill stuffing
- Yarn needle (tapestry needle)
- Scissors
- Stitch marker
- Fabric glue (optional, for securing tail feathers)
Cotton vs. Acrylic Yarn for Amigurumi
When choosing yarn for amigurumi, fiber type affects durability, stitch definition, and washability. Here’s a quick comparison:
| Feature | Cotton Yarn | Acrylic Yarn |
|---|---|---|
| Stiffness | Holds shape well, less stretch | More stretchy, may require tighter tension |
| Washability | Machine washable, durable | Machine washable, prone to pilling |
| Stitch Definition | Excellent for detailed work | Good, but may blur with loose tension |
| Cost | Moderate to high | Affordable and widely available |
| Best For | Dolls, amigurumi with fine details | Plushies, beginners, budget projects |
For this Peacock, we recommend using 100% acrylic yarn for its affordability and ease of care, especially if the toy will be handled by children. However, cotton yarn like Lily Sugar ‘n Cream works beautifully for a more rigid, sculptural look.
Step-by-Step Peacock Crochet Pattern
This pattern uses US crochet terms. Begin each piece with a magic ring unless otherwise noted.
Step 1: Crochet the Head
Rounds: Work in continuous spirals (do not join rounds). Use a stitch marker to track your first stitch of each round.
- Round 1: 6 sc in magic ring. (6)
- Round 2: 2 sc in each st around. (12)
- Round 3: *Sc in next st, 2 sc in next st*, repeat from * to * around. (18)
- Round 4: Sc in next 2 sts, 2 sc in next st, *sc in next 3 sts, 2 sc in next st*, repeat from * to * around. (24)
- Rounds 5–8: Sc in each st around. (24)
- Round 9: Sc in next 2 sts, sc2tog, *sc in next 3 sts, sc2tog*, repeat from * to * around. (20)
- Round 10: Sc in next st, sc2tog, *sc in next 2 sts, sc2tog*, repeat from * to * around. (15)
- Fasten off and leave a long tail for sewing.
Step 2: Face Patch / Eye Markings
For a realistic look, embroider the eye patch:
- Using black yarn, embroider a curved line above the center of the head for the eye stripe.
- Add a small white oval below the stripe for the eye.
- Optional: Add a thin black line to outline the eye.
Step 3: Crochet the Body
- Round 1: 6 sc in magic ring. (6)
- Round 2: 2 sc in each st around. (12)
- Round 3: *Sc in next st, 2 sc in next st*, repeat from * to * around. (18)
- Round 4: Sc in next 2 sts, 2 sc in next st, *sc in next 3 sts, 2 sc in next st*, repeat from * to * around. (24)
- Round 5: Sc in each st around. (24)
- Round 6: *Sc in next 3 sts, sc2tog*, repeat from * to * around. (20)
- Round 7: *Sc in next 2 sts, sc2tog*, repeat from * to * around. (15)
- Rounds 8–10: Sc in each st around. (15)
- Fasten off with a long tail.
Step 4: Crochet the Arms (x2)
Make two identical arms.
- Round 1: 6 sc in magic ring. (6)
- Round 2: Sc in each st around. (6)
- Round 3: *Sc in next 2 sts, sc2tog*, repeat from * to * around. (5)
- Fasten off and leave a tail for sewing.
Step 5: Crochet the Legs (x2)
Make two identical legs.
- Round 1: 6 sc in magic ring. (6)
- Round 2: *Sc in next 2 sts, 2 sc in next st*, repeat from * to * around. (8)
- Round 3: Sc in each st around. (8)
- Round 4: *Sc in next 3 sts, sc2tog*, repeat from * to * around. (7)
- Round 5: Sc in each st around. (7)
- Fasten off and leave a long tail.
Step 6: Special Features Unique to the Peacock
Tail Feathers (Make 10–12)
- Chain 15.
- Row 1: Sc in 2nd ch from hook and in each ch across. (14)
- Row 2: Ch 1, turn, sc in first 2 sts, sc2tog twice, sc in next 8 sts. (12)
- Row 3: Ch 1, turn, sc in first 2 sts, sc2tog, sc in next 8 sts. (11)
- Fasten off. Weave in ends.
- Attach: Sew feathers to the back of the body in a fan shape using fabric glue or stitching.
Beak
- Chain 4.
- Row 1: Sc in 2nd ch from hook, hdc in next, dc in last. (3)
- Row 2: Ch 1, turn, sc in first 2 sts, sl st in last. (2)
- Fasten off and sew to the front of the head.
Feet
- Chain 6.
- Row 1: Sc in 2nd ch from hook and in each ch across. (5)
- Row 2: Ch 1, turn, sc in each st. (5)
- Row 3: Ch 1, turn, sc in first 3 sts, sc2tog. (4)
- Fasten off and sew to the bottom of each leg.
Step 7: Assembly
- Stuff the head and body firmly with fiberfill.
- Sew the head to the top of the body using the long tail and a whip stitch.
- Attach safety eyes or embroider eyes between Rounds 5–7 of the head.
- Sew the arms to the sides of the body, slightly angled downward.
- Sew the legs to the bottom of the body, spaced evenly apart.
- Attach the beak to the front of the head.
- Weave in all ends securely.
Crochet Graphic (Peacock Body)
Here’s a simplified ASCII representation of the Peacock’s body shape. This visual helps you visualize the tapering form as you crochet:
● / \ / \ O O / \ x x / \ x x \ / x x \ / O O \ / ●
Legend:
| Symbol | Stitch |
|---|---|
| x | Single Crochet (sc) |
| V | Increase (2 sc in one st) |
| A | Decrease (sc2tog) |
| O | Chain (ch) |
| ● | Slip Stitch (sl st) |
Finished Measurements
| Measurement | Size |
|---|---|
| Height (from head to feet) | 8 inches (20 cm) |
| Width (across body) | 5 inches (13 cm) |
| Skill Level | Beginner |
Creative Uses for Your Crochet Peacock
This charming amigurumi isn’t just a toy—it’s a versatile decor piece and gift!
- Baby shower gift: Pair it with a soft blanket or rattle for a memorable present.
- Nursery decoration: Hang it on a shelf or crib mobile for a whimsical touch.
- Etsy product: Sell your creations on Etsy—handmade animals are highly sought after!
- Birthday present: Customize colors to match the recipient’s favorite hues.
- Holiday ornament: Add a loop to the top and hang it on your Christmas tree.
For more gift ideas, explore crochet gift ideas for every occasion.
Common Mistakes to Avoid When Crocheting a Peacock
- Overstuffing: Too much fiberfill can distort the shape. Stuff firmly but not tightly.
- Inconsistent tension: Keep your stitches even to maintain a smooth, professional look.
- Skipping stitch markers: Use a stitch marker at the start of each round to avoid losing your place.
- Ignoring color changes: Weave in ends as you go to prevent bulky knots later.
- Rushing the assembly: Take your time aligning parts for a symmetrical final product.
Tips for Maximizing Results
- Use stitch counters: Keep track of rounds, especially during shaping.
- Block your pieces: Lightly steam or wet-block the head and body to smooth out stitches.
- Experiment with textures: Add a few rows of half-double crochet (hd