Introduction
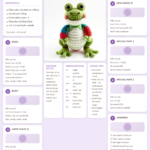
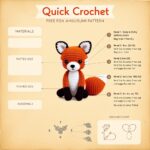
Ever wondered what it would be like to crochet a slow-moving, tree-hugging friend? This crochet sloth pattern brings that dream to life with an easy amigurumi approach that’s perfect for both beginners and experienced crafters. Whether you’re looking for a heartwarming gift, a cozy nursery decor piece, or simply a fun weekend project, this crochet sloth is the ideal companion.
Amigurumi, the Japanese art of knitting or crocheting small stuffed yarn creatures, has gained immense popularity in recent years. With its growing demand on platforms like Etsy and Instagram, more crafters are turning to crochet animal patterns to create unique, handmade gifts. This easy amigurumi pattern is designed with simplicity in mind, ensuring your sloth comes together smoothly without overwhelming stitch techniques or complex shaping.
Why You Will Love This crochet
- Perfect for Beginners: This pattern uses basic stitches like single crochet, increases, and decreases—ideal for crocheters just starting out with amigurumi.
- Trending Design: Sloths are among the most beloved cute crochet animals on social media and crafting communities, making this a timely and sought-after project.
- Great for Gifting: Handmade sloths make adorable baby shower gifts, holiday presents, or thoughtful tokens for animal lovers.
- Nursery & Home Decor: The soft, plush texture and charming design of your completed sloth can beautifully complement a child’s room or any cozy corner.
- Sells Well on Etsy: Handmade sloths are consistently top sellers. With this free pattern, you can create your own inventory or customize colors for a unique product line.
- Cute & Functional: Amigurumi sloths are not just decorative—they’re great stress relievers and comfort objects too!
Materials and Tools You Need
Before you begin your crochet sloth, gather these essential materials:
Yarn Colors and Uses
- Main Body: Light brown or beige worsted weight (#4) yarn. This mimics the natural fur of real sloths.
- Underside & Face: Darker brown yarn for contrast, especially around the belly and snout.
- Claws & Facial Features: Black yarn or embroidery thread for detailing.
Supplies Checklist
- Crochet hook: 3.5mm (E/4) or 4.0mm (G/6) — size may vary based on yarn thickness.
- Safety eyes: 10–12mm (optional: embroider eyes instead for a handmade feel).
- Fiberfill stuffing: Polyester or cotton stuffing to give your sloth a soft, huggable shape.
- Stitch marker: To mark the beginning of rounds (especially important in amigurumi).
- Yarn needle: For sewing parts together and weaving in ends.
- Scissors: Sharp, small scissors for trimming yarn.
- Embroidery needle & thread: For facial details if not using safety eyes.
Yarn Type Comparison Table
| Yarn Type | Pros | Cons | Best For |
|---|---|---|---|
| Cotton Yarn | Sturdy, holds shape well, eco-friendly, breathable | Can be stiff, less stretchy, harder on hands | Structured amigurumi like this sloth |
| Acrylic Yarn | Affordable, soft, easy to care for, wide color range | Less durable, may stretch over time | Beginner projects, frequent washing |
For this crochet sloth, cotton yarn is recommended for its durability and crisp stitch definition, which helps maintain the sloth’s rounded shape. However, acrylic works well if you’re on a budget or prefer ultra-soft texture.
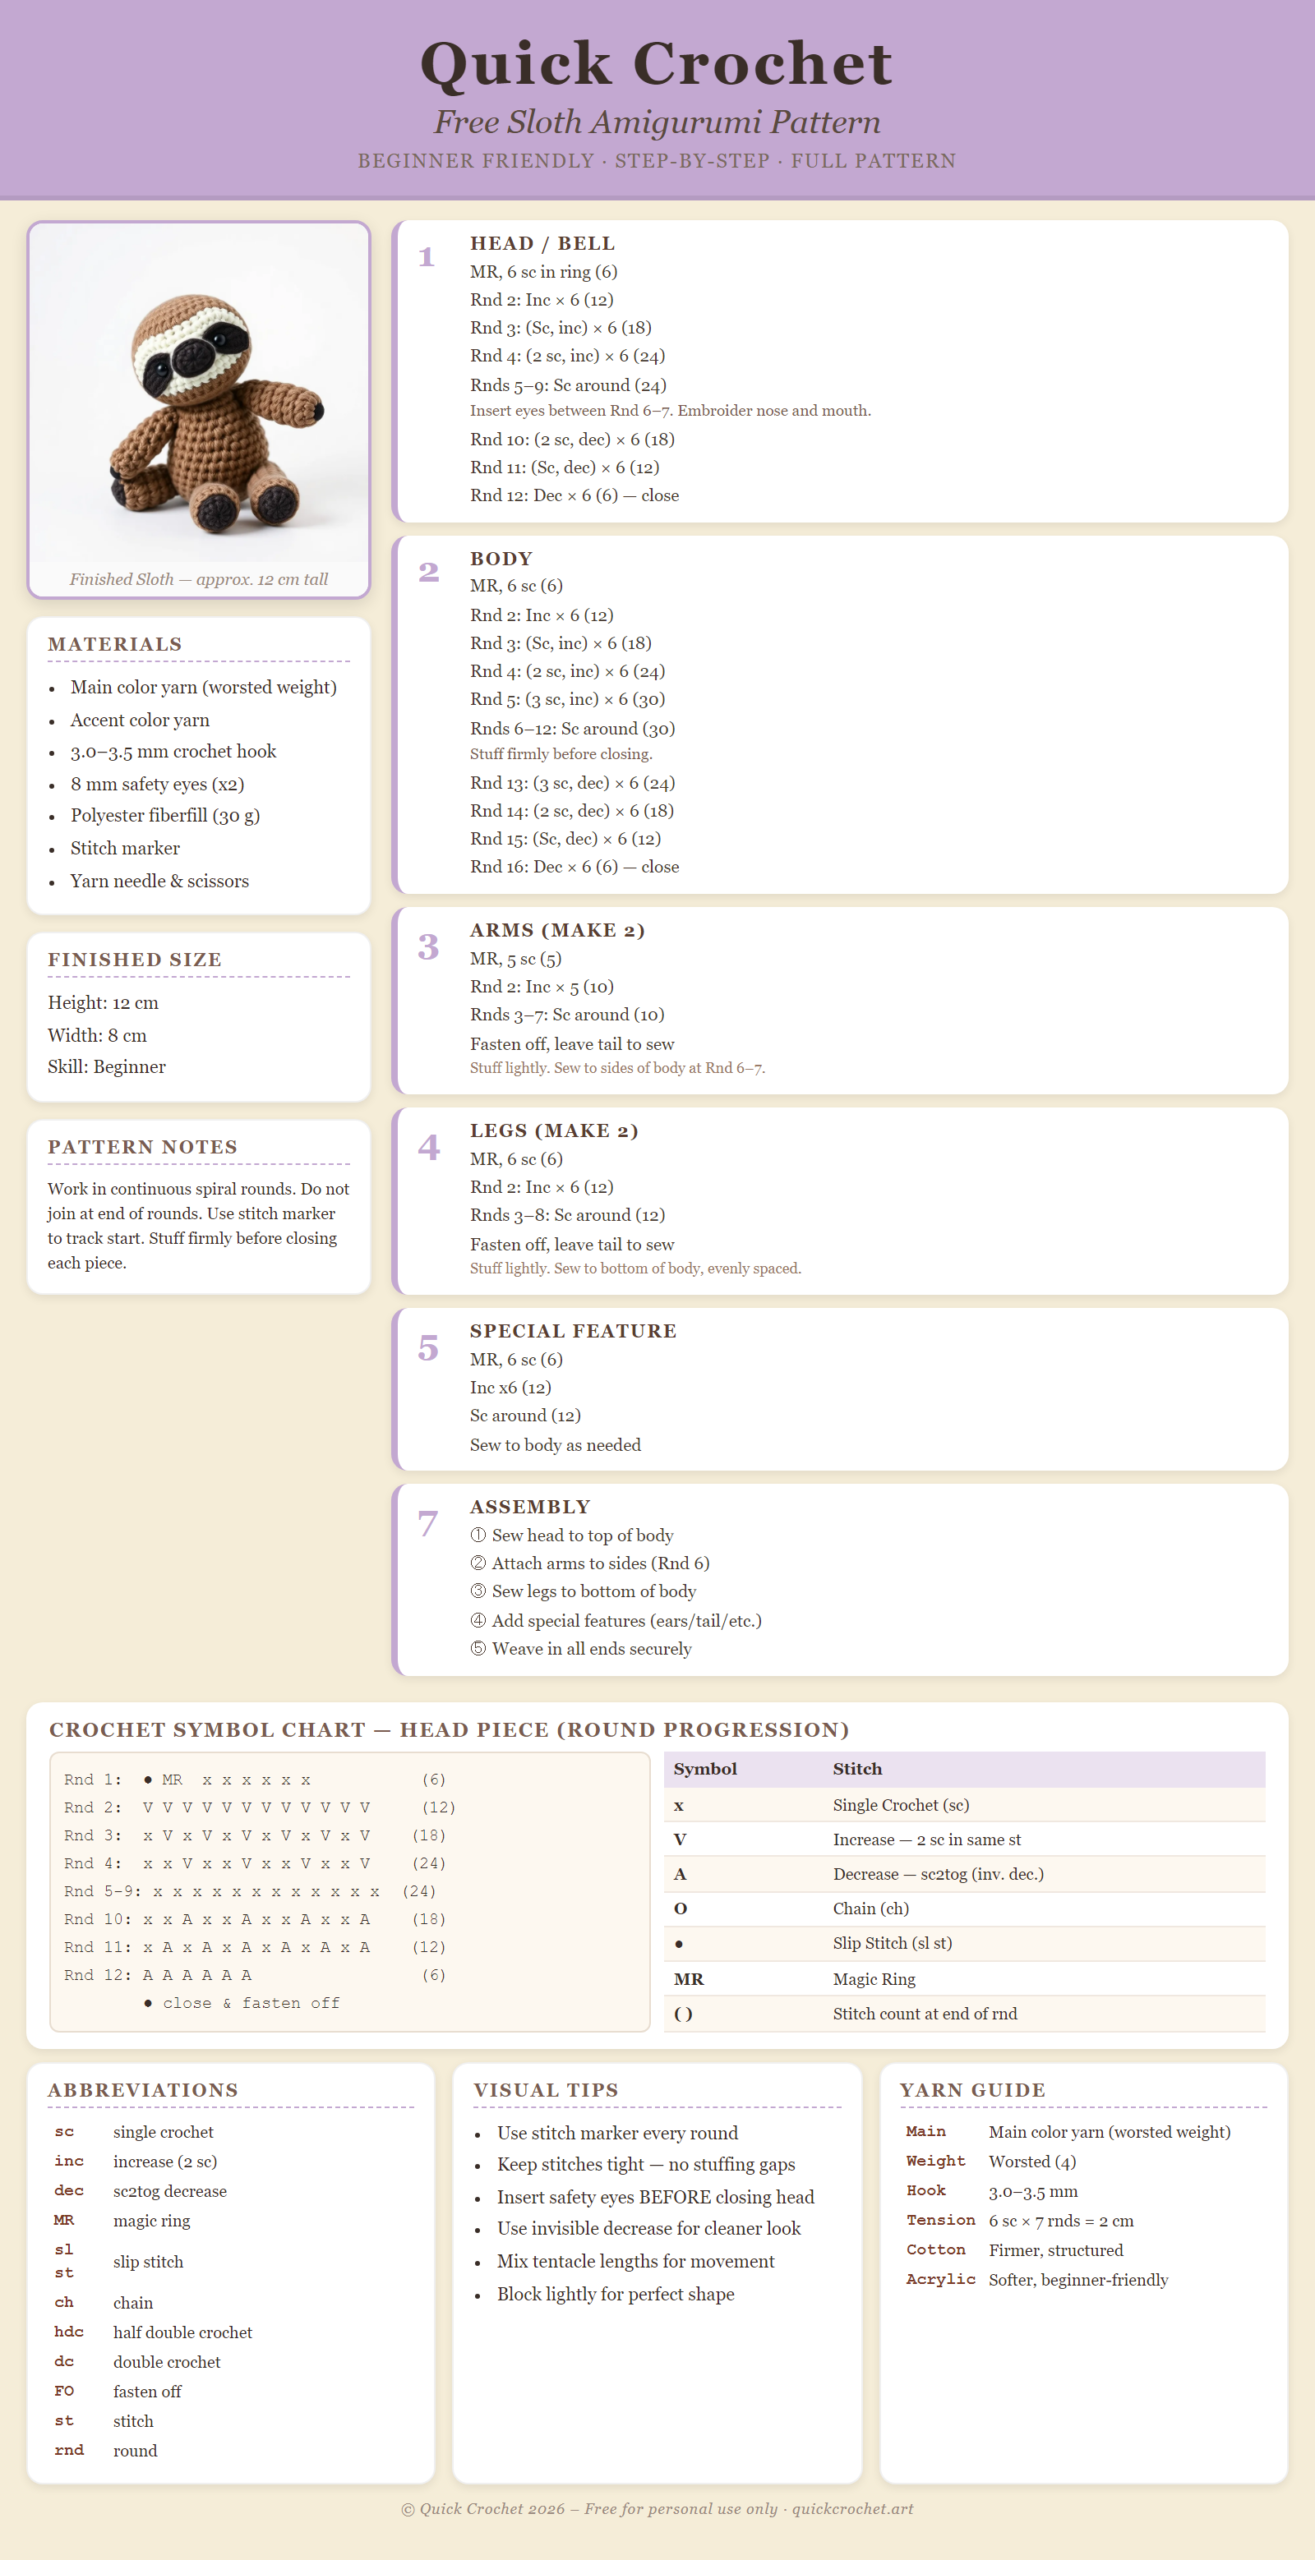
Step-by-Step Sloth Crochet Pattern
Step 1: Crochet the Head
Start with a magic ring.
- Rnd 1: 6 sc in magic ring. (6)
- Rnd 2: 2 sc in each st around. (12)
- Rnd 3: (Sc in next st, 2 sc in next st) around. (18)
- Rnd 4: Sc in next 2 sts, 2 sc in next st, repeat around. (24)
- Rnd 5–7: Sc in each st around. (24)
- Rnd 8: Sc in next 2 sts, sc2tog, repeat around. (18)
- Rnd 9: Sc2tog around. (9)
- Fasten off. Leave a long tail for sewing.
Stuff lightly before closing.
Step 2: Face Patch & Eye Markings
Using darker brown yarn, embroider a small patch on the face area—sloths have distinctive facial markings! Use black yarn to embroider closed eyes or add a small black dot for the nose. Alternatively, attach safety eyes (10mm) spaced about 6–8 rounds from the top.
Step 3: Crochet the Body
Begin again with a magic ring.
- Rnd 1: 6 sc in magic ring. (6)
- Rnd 2: 2 sc in each st around. (12)
- Rnd 3: (Sc in next st, 2 sc in next st) around. (18)
- Rnd 4: Sc in next 2 sts, 2 sc in next st, repeat around. (24)
- Rnds 5–12: Sc in each st around. (24)
- Rnd 13: Sc in next 2 sts, sc2tog, repeat around. (18)
- Rnd 14: Sc2tog around. (9)
- Fasten off. Leave a long tail.
Stuff firmly to give the sloth its signature round belly.
Step 4: Crochet the Arms (×2)
Sloth arms are long and slightly curved—perfect for wrapping around branches!
- Rnd 1: 6 sc in magic ring. (6)
- Rnd 2: 2 sc in each st around. (12)
- Rnds 3–8: Sc in each st around. (12)
- Rnd 9: Sc in each st, decreasing evenly to close. (6)
- Fasten off. Leave a long tail for sewing.
Flatten slightly and sew the bottom edge closed. Repeat for second arm.
Step 5: Crochet the Legs (×2)
Legs are shorter and slightly wider at the base.
- Rnd 1: 6 sc in magic ring. (6)
- Rnd 2: 2 sc in each st around. (12)
- Rnds 3–6: Sc in each st around. (12)
- Rnd 7: Sc in each st, decreasing evenly to close. (6)
- Fasten off. Leave a long tail.
Slightly flatten the base to give a foot-like shape.
Step 6: Special Features Unique to the Sloth
Add realistic details to bring your sloth to life:
- Claws: Using black yarn or thread, embroider three curved lines on each hand and foot.
- Fur Texture: Use a smaller hook and pull up loops on the top of the head or back to create a “fluffy” effect with a technique called surface slip stitch.
- Tail: Crochet a short chain (8–10 ch), fold in half, and sew to the back of the body.
Step 7: Assembly
- Attach Head to Body: Align the flat bottom of the head with the top of the body. Use the yarn tail to sew securely with whipstitch.
- Attach Arms: Position arms at the sides, slightly forward, so the sloth looks like it’s hugging. Sew in place.
- Attach Legs: Sew legs to the bottom of the body, spaced evenly.
- Add Tail: Sew to the back, curling slightly upward.
- Weave in All Ends: Use a yarn needle to hide all loose ends inside the stuffing.
Tip: Use a stitch marker to hold parts in place before final sewing.
Crochet Graphic (Sloth Body)
Here’s a simplified ASCII chart representing the body of your crochet sloth. This reflects the rounded torso with a wider middle and tapered top and bottom.
● O V x x x V x x x x x x x x x x x x x x x x x A x x x x x A A x x x x A A A x x x A A A A O O O O O O
Legend:
| x | Single Crochet |
| V | Increase (2 sc in 1 st) |
| A | Decrease (sc2tog) |
| O | Chain stitch |
| ● | Slip stitch |
Note: This graphic is a simplified representation. Refer to the written pattern for accurate stitch counts and shaping.
Finished Measurements
| Measurement | Size |
|---|---|
| Height (from head to tail) | Approximately 8 inches (20 cm) |
| Width (widest point, belly) | Approximately 4.5 inches (11 cm) |
| Skill Level | Beginner |
Creative Uses for Your Crochet Sloth
- Baby Shower Gift: Pair your sloth with a tiny crochet blanket or pacifier clip for a thoughtful present.
- Nursery Decoration: Hang your sloth from a mobile or place it on a shelf as part of a jungle-themed nursery.
- Etsy Product: List your sloth as a digital pattern download or finished plushie—sloths are top sellers in the amigurumi category.
- Birthday Present: Give it to a nature lover, zoo fan, or anyone who appreciates slow living!
- Holiday Ornament: Add a loop and hang your sloth on a Christmas tree as a whimsical, handmade decoration.
- Photo Prop: Use in family photos or as a background element for themed picture days.
You can also personalize your sloth by changing colors—try pastels for a baby shower or bright neons for a modern twist!
Common Mistakes to Avoid
- Overstuffing: Too much fiberfill can distort the sloth’s shape and make stitches tight. Stuff firmly but not excessively.
- Inconsistent tension: Keep your stitches tight and even to maintain a clean, professional look—amigurumi relies on consistent tension.
- Skipping the stitch marker: Always mark the start of each round to avoid losing count, especially in the head and body.
- Ignoring the tail placement: Sloths have short tails; don’t make it too long or stiff—it should curl naturally.
- Skipping facial details: The face is what makes the sloth recognizable! Take time to embroider eyes, nose, and markings clearly.
Tips for Maximizing Results
- Use a smaller hook: A 3.5mm hook with worsted yarn creates a tighter fabric, preventing stuffing from showing through.
- Weave in ends as you go: Reduces bulk and keeps your sloth looking neat.
- Try a stitch counter app: Helps track rounds, especially useful for beginners.
- Block your finished sloth: Gently shape and steam (if using acrylic) to set stitches and smooth any uneven areas.
- Watch a video tutorial: Supplement your pattern with a visual guide—many crafters find video demos helpful for tricky assembly steps.
- Join a crochet community: Share your progress on platforms like Ravelry or Instagram with hashtags like #CrochetSloth #AmigurumiSloth for inspiration and feedback.
Pro Tip: If you’re new to amigurumi, practice the magic ring and single crochet stitches on a small swatch first. This builds muscle memory and confidence before starting your sloth!
Conclusion
This free crochet sloth pattern is your gateway to creating a charming, huggable plushie that’s as fun to make as it is to display. Whether you’re crafting for relaxation, gifting, or profit, this amigurumi sloth delivers on cuteness, simplicity, and versatility. With step-by-step instructions, clear graphics, and tips from seasoned crafters, you’ll have a handmade sloth ready to hang out on your shelf or in a little one’s room in no time.