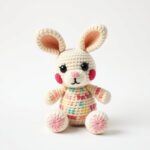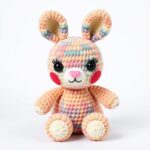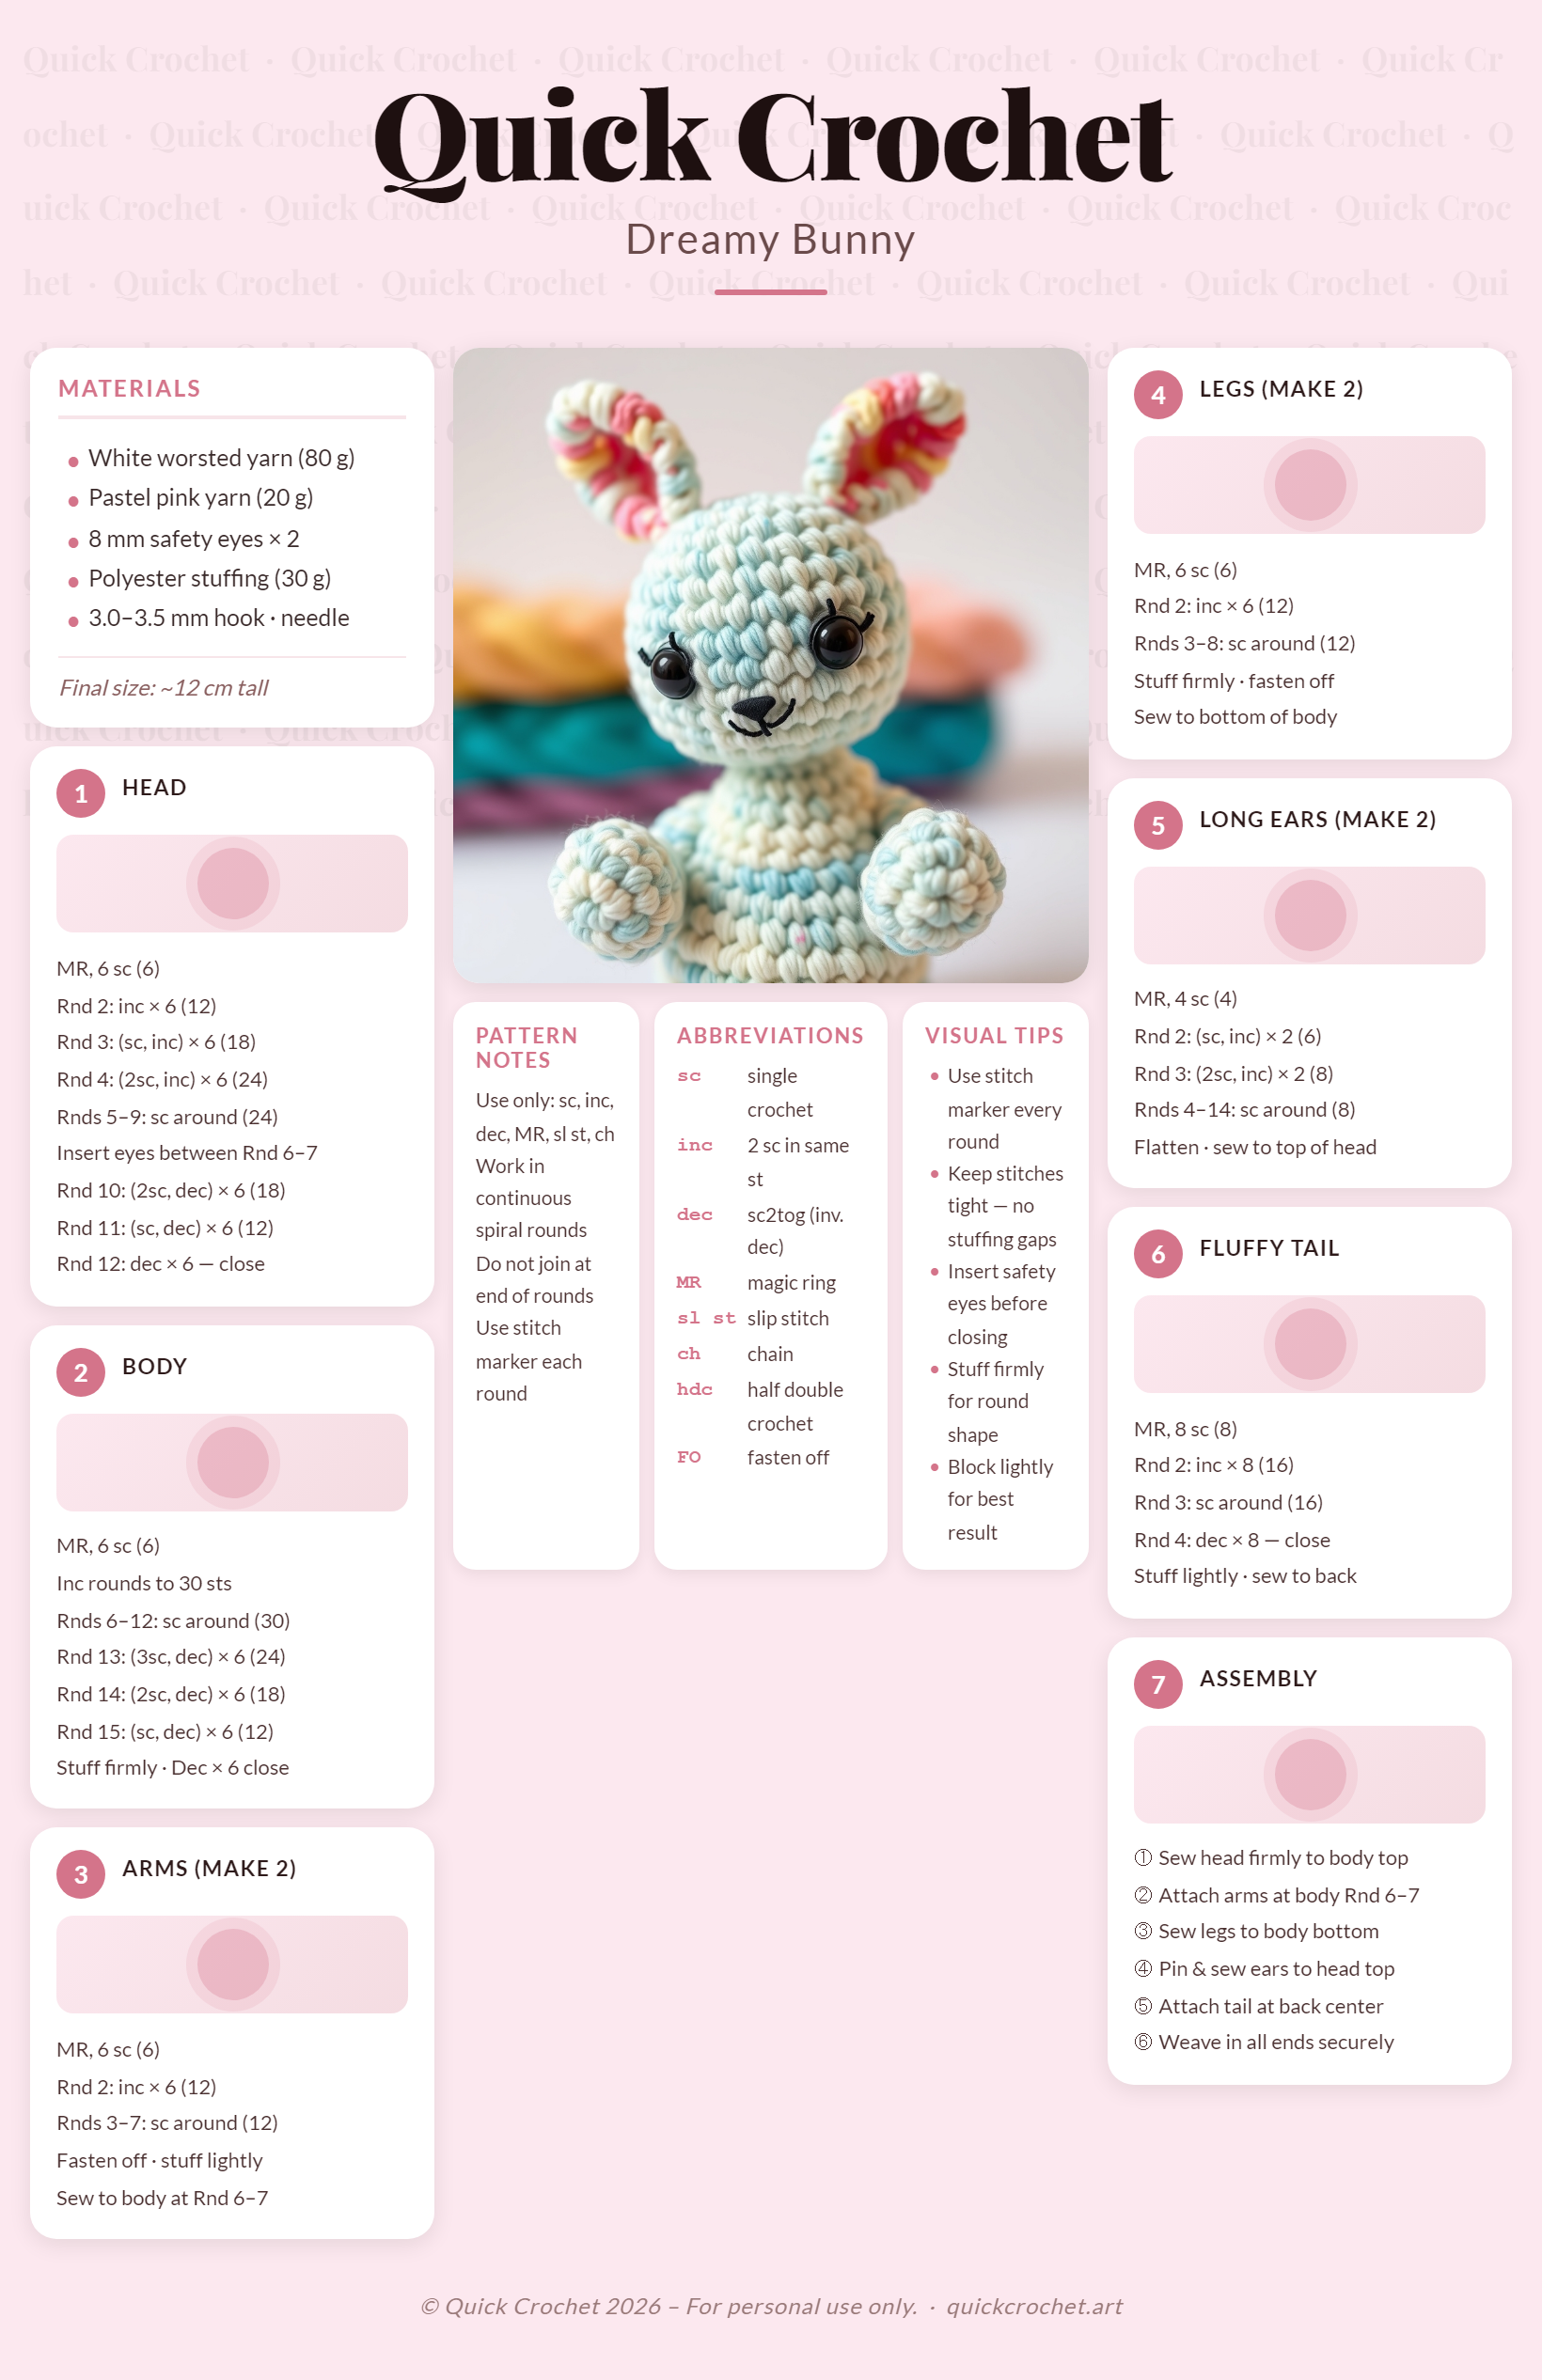
Free Bunny Crochet Pattern – Your Guide to a Cute Amigurumi Bunny
Have you ever wanted to crochet your own soft, huggable bunny but felt overwhelmed by complex patterns? What if I told you there’s a beginner-friendly crochet project that takes less than a weekend to complete—and results in a charming stuffed Bunny toy you’ll love to keep or give as a gift?
This free Bunny crochet pattern is your perfect starting point. Whether you’re new to amigurumi or looking for a quick, satisfying project, this pattern delivers a cute crochet plushie that’s as fun to make as it is to cuddle. Plus, it’s a fantastic addition to your home decor or a thoughtful handmade gift for any occasion.
Let’s dive into this easy amigurumi Bunny pattern and create something magical together!
—
Why You Will Love This crochet
- Trending & Adorable: Cute crochet animals are all the rage on Etsy and Instagram—your Bunny will fit right in!
- Beginner-Friendly: Step-by-step instructions make this ideal for those just learning amigurumi.
- Great Gift Idea: Handmade Bunny toys make perfect presents for babies, toddlers, or animal lovers.
- Nursery Decor: Add a handmade touch to a nursery with this soft, huggable crochet bunny.
- Popular on Etsy: Many crocheters sell similar designs—now you can make your own!
- Cute & Customizable: Swap colors or add embroidered details to personalize your bunny.
—
Materials and Tools You Need
Before you start crocheting your bunny, gather your supplies. Here’s what you’ll need:
Yarn Colors
- White yarn (main color): For the body and head of your bunny.
- Pink yarn: For the inner ears, snout, and paws.
- Black yarn (optional): For embroidering eyes, nose, or other markings.
Hook & Notions
- Crochet hook: 2.5mm (C/2) for tight stitches perfect for amigurumi.
- Safety eyes: 9mm (or embroider eyes if preferred).
- Fiberfill stuffing: High-quality polyester stuffing to plump up your bunny.
- Stitch marker: To mark your first stitch in each round.
- Yarn needle: For weaving in ends and sewing parts together.
- Scissors: For trimming yarn.
Yarn Comparison Table
| Type | Pros | Cons | Best For |
|---|---|---|---|
| Cotton yarn | Firm stitches, holds shape well | Less stretchy, can be stiff | Structured amigurumi like bunnies |
| Acrylic yarn | Soft, affordable, widely available | Less durable, may stretch over time | Beginner projects, gifts |
💡 Tip: For best results, choose a smooth, medium-weight yarn (worsted or DK). Avoid fuzzy or textured yarns—they make stitches harder to count.
—
Step-by-Step Bunny Crochet Pattern
This pattern uses US crochet terms. If you’re new to amigurumi, remember to work in continuous rounds (spiral) and use a stitch marker to track your first stitch.
Step 1: Crochet the Head
Round 1: Magic ring, 6 sc into ring. (6)
Round 2: 2 sc in each stitch. (12)
Round 3: *Sc in next stitch, 2 sc in following stitch; repeat from * around. (18)
Round 4: *Sc in next 2 stitches, 2 sc in following stitch; repeat from * around. (24)
Round 5–8: Sc in each stitch. (24)
Round 9: *Sc in next 2 stitches, sc2tog; repeat from * around. (18)
Round 10: Sc in each stitch. (18)
Round 11: *Sc in next stitch, sc2tog; repeat from * around. (12)
Round 12: Sc2tog around. (6)
Fasten off. Leave a long tail for sewing.
Step 2: Face Patch / Eye Markings
Optional: Use pink yarn to embroider a small snout and cheeks on the head. For eyes, either:
- Sew on black safety eyes (9mm), positioned 4 stitches apart.
- Embroider eyes using black yarn.
Add a small pink nose with yarn or felt.
Step 3: Crochet the Body
Round 1: Magic ring, 6 sc into ring. (6)
Round 2: 2 sc in each stitch. (12)
Round 3: *Sc in next stitch, 2 sc in following stitch; repeat from * around. (18)
Round 4: *Sc in next 2 stitches, 2 sc in following stitch; repeat from * around. (24)
Round 5–10: Sc in each stitch. (24)
Round 11: *Sc in next 2 stitches, sc2tog; repeat from * around. (18)
Round 12: Sc in each stitch. (18)
Round 13: *Sc in next stitch, sc2tog; repeat from * around. (12)
Round 14: Sc2tog around. (6)
Fasten off. Leave a long tail for sewing.
Step 4: Crochet the Arms (make 2)
Round 1: Magic ring, 6 sc into ring. (6)
Round 2–4: Sc in each stitch. (6)
Fasten off. Leave a long tail. Flatten slightly and sew to the body.
Step 5: Crochet the Legs (make 2)
Round 1: Magic ring, 6 sc into ring. (6)
Round 2–6: Sc in each stitch. (6)
Fasten off. Leave a long tail. Flatten slightly and sew to the bottom of the body.
Step 6: Special Features Unique to the Bunny
Ears (make 2)
Round 1: Magic ring, 6 sc into ring. (6)
Round 2: 2 sc in each stitch. (12)
Round 3: *Sc in next stitch, 2 sc in following stitch; repeat from * around. (18)
Round 4–6: Sc in each stitch. (18)
Fasten off white yarn. Attach pink yarn and sc in next round for the inner ear.
Fold each ear in half lengthwise and sew to the top of the head.
Tail
Make a small ball using the magic ring method:
Round 1: 6 sc into ring. (6)
Round 2: 2 sc in each stitch. (12)
Round 3: Sc in each stitch. (12)
Fasten off and sew to the back of the bunny.
Step 7: Assembly
- Stuff the head and body firmly with fiberfill.
- Sew the head to the top of the body using the long tail and a yarn needle.
- Sew the arms to the sides of the body, slightly forward.
- Sew the legs to the bottom of the body, angled slightly outward.
- Attach the ears, ensuring they stand upright.
- Sew on the tail at the back.
- Embroider any final details like whiskers or a mouth.
—
Crochet Graphic (Bunny Body)
Here’s an ASCII crochet chart showing the shape of the bunny’s body. Use this as a visual guide when working your stitches.
● / \ x x / \ x x x x / \ x x x x \ / x x x x \ / x x x ●
Legend:
| Symbol | Meaning |
|---|---|
| x | Single Crochet (sc) |
| V | Increase (2 sc in 1 stitch) |
| A | Decrease (sc2tog) |
| O | Chain (ch) |
| ● | Slip Stitch (sl st) |
—
Finished Measurements
| Attribute | Measurement |
|---|---|
| Height | Approximately 8 inches (20 cm) |
| Width (across body) | Approximately 4 inches (10 cm) |
| Skill Level | Beginner |
—
Creative Uses for Your Crochet Bunny
- 🎁 Baby shower gift: A soft, safe handmade bunny toy for little ones.
- 🏡 Nursery decoration: Place your bunny on a shelf or crib as a cute accent.
- 🛍️ Etsy product: Turn your hobby into income by selling your creations.
- 🎂 Birthday present: A personalized crochet bunny for a child or animal lover.
- 🎄 Holiday ornament: Make a miniature version as a festive decoration.
💡 Idea: Add a tiny scarf or bow to make your bunny extra special!
—
Common Mistakes to Avoid
- Skipping stitch markers: Always mark your first stitch to avoid spiraling errors.
- Overstuffing: Don’t pack too much fiberfill—it can distort the shape.
- Inconsistent tension: Keep your stitches tight and even for a professional look.
- Skipping increases/decreases: Follow the pattern exactly to maintain shape.
- Rushing assembly: Take your time sewing parts together for a neat finish.
—
Tips for Maximizing Results
- Use stitch markers: Helps track rounds and prevents mistakes.
- Weave in ends securely: Prevents unraveling and gives a clean finish.
- Block your pieces: Gently shape the head and body before assembly.
- Experiment with color: Try pastel shades or variegated yarn for a unique look.
- Practice tension: Amigurumi works best with a slightly tight tension.
—
Conclusion
This free Bunny crochet pattern is your ticket to creating a charming, handmade amigurumi bunny that’s perfect for beginners and experienced crocheters alike. Whether you’re making it as a gift, a nursery decoration, or just for fun, the result is a huggable, adorable crochet plushie you’ll be proud to show off.
Ready to get started? Download the free pattern and start crocheting your Bunny today!
—
Frequently Asked Questions
- Can I use a different yarn weight?
Yes, but adjust your hook size accordingly. For example, use a 3.5mm hook with worsted weight yarn.
- How do I prevent gaps in my amigurumi?
Work in continuous rounds, keep tension firm, and avoid stretching stitches.
- Do I need safety eyes?
No! You can embroider eyes using black yarn or felt for a cute, vintage look.
- How long does it take to crochet a bunny?
About 4–6 hours, depending on your speed and experience level.
- Can I wash my crochet bunny?
Yes, hand wash in cold water and lay flat to dry to preserve shape.
- What’s the best yarn for beginners?
Medium-weight acrylic yarn is budget-friendly and easy to work with.
- Can I sell bunnies made from this pattern?
Yes! Just credit the pattern (e.g., “Pattern by [Your Name]”).
Happy crocheting! 🧶✨