Introduction
Have you ever wondered how to transform a simple ball of yarn into a charming crochet sea turtle that could swim into your heart? This easy amigurumi sea turtle pattern is your perfect starting point! Whether you’re a beginner looking for a fun project or an experienced crocheter wanting to make a unique plushie, this pattern delivers.
Amigurumi is the Japanese art of knitting or crocheting small stuffed yarn creatures. These handmade stuffed sea turtles make wonderful gifts, nursery decorations, or simply something cute to craft during your free time. Plus, they’re a fantastic way to practice fundamental crochet stitches while creating something beautiful.
Why You Will Love This crochet
- Beginner-friendly: Uses basic stitches like single crochet, increases, and decreases.
- Trending design: Sea turtles are popular in summer decor and children’s rooms.
- Great gift idea: Handmade amigurumi is meaningful and personal.
- Nursery decoration: Soft, safe, and adorable for a baby’s room.
- Perfect Etsy product: Unique handmade toys sell well online.
- Cute and portable: Small enough to crochet anywhere!
Materials and Tools You Need
Before you begin, gather your supplies. For this crochet sea turtle, you’ll need:
Yarn Colors
- Shell: Green or turquoise (main color) – approximately 100 yards
- Plastron (underbelly): Light green, cream, or pale yellow – 30 yards
- Fins and head: Same green as shell – 15 yards
- Accent markings: Dark green or black (for shell patterns) – 10 yards
I recommend using 100% cotton yarn for durability and stitch definition, especially for amigurumi. Cotton holds its shape well and is easier to stuff evenly. However, acrylic yarn is a budget-friendly alternative that’s soft and widely available.
| Feature | Cotton Yarn | Acrylic Yarn |
|---|---|---|
| Durability | High – holds stitches well | Moderate – can stretch slightly |
| Stitch Definition | Excellent | Good |
| Price | Moderate | Budget-friendly |
| Softness | Firm, less fluffy | Softer, plush feel |
| Best For | Amigurumi, dishcloths, market bags | Toys, blankets, quick gifts |
Other Supplies
- Crochet hook: 2.5 mm (C/2) – size may vary slightly based on yarn weight
- Safety eyes: 6 mm (optional: embroider eyes instead)
- Fiberfill stuffing: Polyester toy stuffing (hypoallergenic)
- Yarn needle (tapestry needle)
- Scissors
- Stitch marker (to mark rounds)
- Fabric glue or sewing thread (to attach limbs securely)
Yarnspirations – Guide to Yarn Types for Amigurumi(https://www.yarnspirations.com) offers excellent insights on choosing the right yarn for your projects.
Step-by-Step Sea Turtle Crochet Pattern
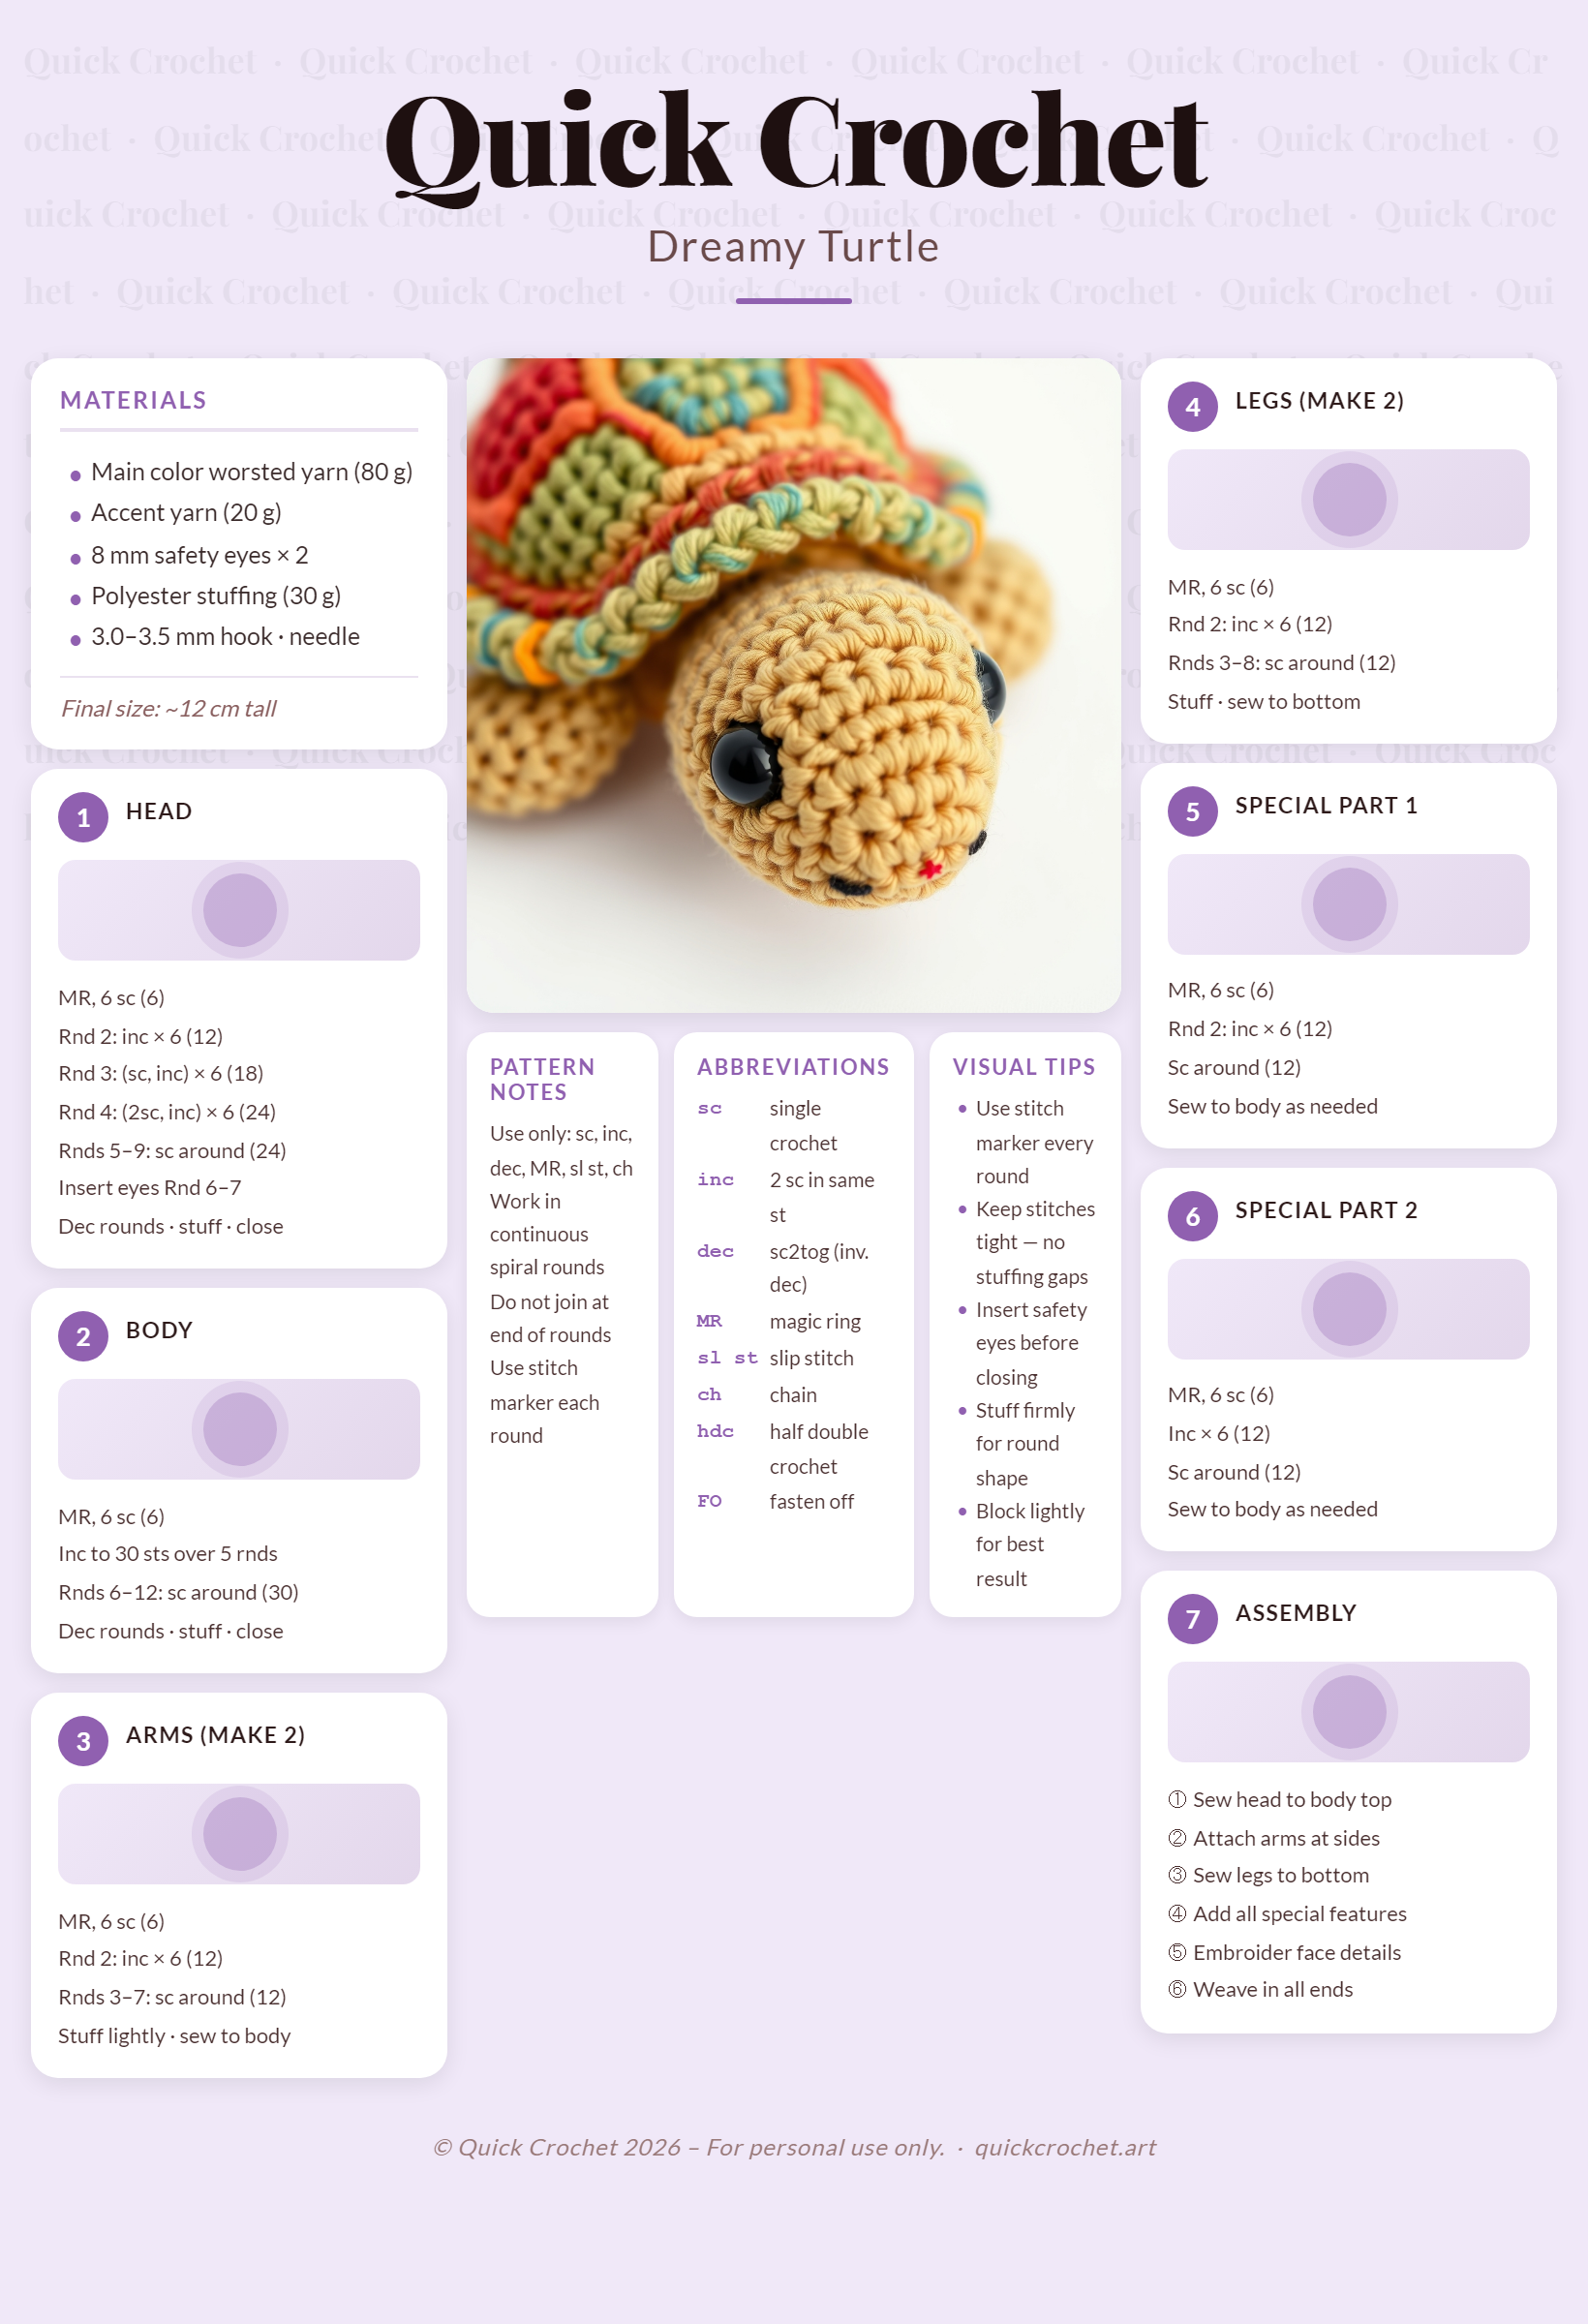
Step 1: Crochet the Head
Start with green yarn.
- Chain 2.
- In the second chain from hook, work 6 single crochet (sc). (6 stitches)
- Round 2: Increase in each stitch. (12 stitches)
- Round 3: *Sc in next stitch, increase in next stitch* repeat around. (18 stitches)
- Round 4: *Sc in next 2 stitches, increase in next stitch* repeat around. (24 stitches)
- Rounds 5–8: Sc in each stitch around. (24 stitches each round)
- Round 9: *Sc in next 2 stitches, decrease (sc2tog) in next stitch* repeat around. (18 stitches)
- Stuff lightly.
- Round 10: Decrease around. (9 stitches)
- Fasten off and weave in ends.
Step 2: Face Patch / Eye Markings
If using safety eyes, insert 6mm eyes between rounds 6 and 7, about 4 stitches apart. For embroidered eyes, use black yarn to stitch two small ovals. Add a small smile with black embroidery thread.
Step 3: Crochet the Body
Work in continuous rounds using green yarn.
- Chain 2.
- In second chain from hook, work 6 sc. (6)
- Round 2: Increase in each stitch. (12)
- Round 3: *Sc in next stitch, increase in next stitch* repeat. (18)
- Round 4: *Sc in next 2 stitches, increase in next stitch* repeat. (24)
- Round 5: *Sc in next 3 stitches, increase in next stitch* repeat. (30)
- Rounds 6–12: Sc in each stitch. (30)
- Round 13: *Sc in next 3 stitches, decrease* repeat. (24)
- Round 14: *Sc in next 2 stitches, decrease* repeat. (18)
- Round 15: Sc in each stitch. (18)
- Round 16: *Sc in next stitch, decrease* repeat. (12)
- Stuff firmly.
- Fasten off, leaving a long tail for sewing.
Step 4: Crochet the Arms
Make 2.
- Chain 4.
- Starting in second chain from hook: sc, hdc, dc, sl st. Turn.
- Chain 1, sc in each stitch across. (3 sc)
- Fold flat and slip stitch sides together to form a tube.
- Repeat for second arm.
- Attach to sides of body between rounds 7 and 8 using yarn needle.
Step 5: Crochet the Legs
Make 2.
- Chain 5.
- Starting in second chain from hook: sc, hdc, dc, tr, sl st. Turn.
- Chain 1, sc in each stitch across. (4 sc)
- Fold and slip stitch sides together.
- Repeat for second leg.
- Attach to bottom of body between rounds 9 and 10.
Step 6: Special Features Unique to the Sea Turtle
Sea turtles have distinctive features:
- Shell Pattern: Using dark green yarn, embroider or surface crochet shell scutes (hexagonal shapes). Follow a reference image for authenticity.
- Tail: Create a small pointed tail by chaining 6, sc in second chain from hook, sc across. Attach at the end of the body.
- Markings: Add subtle darker green stripes along the sides of the head and neck using embroidery.
Step 7: Assembly
- Attach head to top of body using yarn needle and long tail.
- Sew arms and legs securely.
- Attach tail at the rear center.
- Weave in all ends.
- Optional: Use fabric glue to reinforce limb attachments.
Crochet Graphic (Sea Turtle Body)
Here’s a simplified ASCII chart to help visualize the body shape. Each symbol represents a stitch in a round:
O x x x V V x x x x x x x A A A A x x x x x x x x x x x x x x x x x A A A A A A A x x x x x x x x x x x
Legend:
| Symbol | Meaning |
|---|---|
| x | Single Crochet (sc) |
| V | Increase (2 sc in one stitch) |
| A | Decrease (sc2tog) |
| O | Chain (starting chain) |
| ● | Slip Stitch (sl st) |
This chart reflects the wider middle section (body) and tapered top (head) and bottom (tail) of the sea turtle.
Finished Measurements
| Measurement | Size |
|---|---|
| Height | Approximately 6 inches (15 cm) |
| Width (at widest point) | About 4 inches (10 cm) |
| Skill Level | Beginner |
Creative Uses for Your Crochet Sea Turtle
- Baby Shower Gift: A soft, safe toy for newborns.
- Nursery Decoration: Add to a mobile or shelf display.
- Etsy Product: Sell handmade sea turtle plushies in your shop.
- Birthday Present: Pair with a book about sea life.
- Holiday Ornament: Decorate a beach-themed Christmas tree.
- Donation: Gift to a children’s hospital or school.
Want to expand your collection? Try making a crochet dolphin or octopus next! The Ultimate Guide to Easy Crochet Animals for Beginners
Common Mistakes to Avoid
- Over-stuffing: Can distort the shape and make stitches tight.
- Inconsistent tension: Leads to visible stitches or uneven texture.
- Skipping stitch markers: Use one to avoid losing your place in rounds.
- Ignoring safety eyes: For babies, embroider eyes instead.
- Not weaving in ends properly: Use a yarn needle and weave ends into multiple stitches.
Tips for Maximizing Results
- Use a hook one size smaller than recommended for tighter stitches that hide stuffing.
- Work in good lighting to avoid eye strain and counting errors.
- Block your piece lightly by dampening and shaping it before assembly.
- Practice decreases on scrap yarn to get smooth, invisible joins.
- Take photos during assembly to document your process—great for tutorials or sharing!
Conclusion
You now have everything you need to crochet a charming sea turtle amigurumi! This free crochet sea turtle pattern is perfect for gifting, decorating, or adding to your plushie collection. Whether you’re a beginner or a seasoned crocheter, this project is fun, rewarding, and full of personality.
Ready to get started? Download your free pattern and let the crochet adventure begin!
Frequently Asked Questions
- Can I use a larger hook for a bigger sea turtle?
Yes! Using a 3.0 mm or 3.5 mm hook will create a larger, loftier turtle. Adjust yarn amount accordingly.
- What’s the best yarn for a washable sea turtle?
Use 100% acrylic yarn labeled “machine washable” for durability and easy care.
- How do I change colors for the shell pattern?
Use the “join-as-you-go” method or surface crochet to add pattern details after assembly.
- Can I sell sea turtles made from this pattern?
Yes, but please credit the designer and link back if selling online.
- What if I don’t have safety eyes?
Embroider eyes using black yarn or thread for a cute, safe finish.
- How long does it take to crochet a sea turtle?
About 3–5 hours for a beginner, depending on speed and attention to detail.
- Is this pattern suitable for a child’s toy?
Yes! Just ensure all parts are securely attached and use safety eyes only if the child is over 3 years old.